
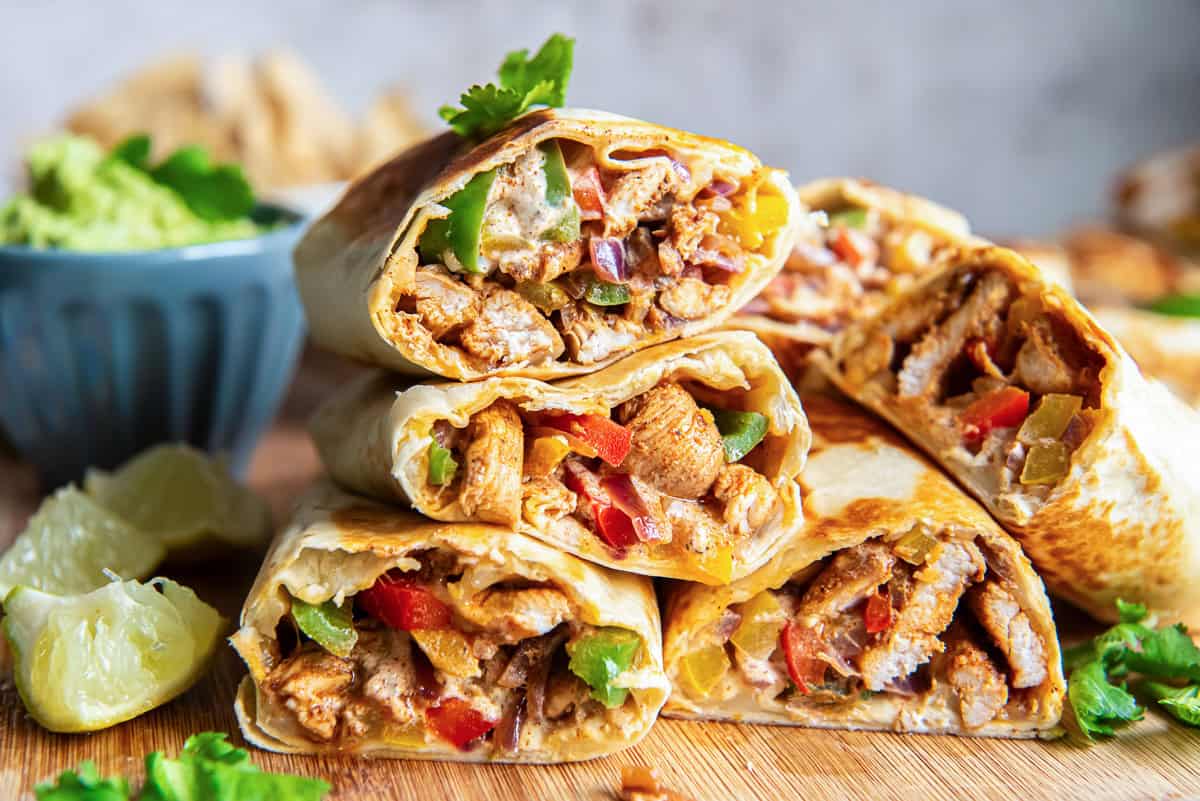
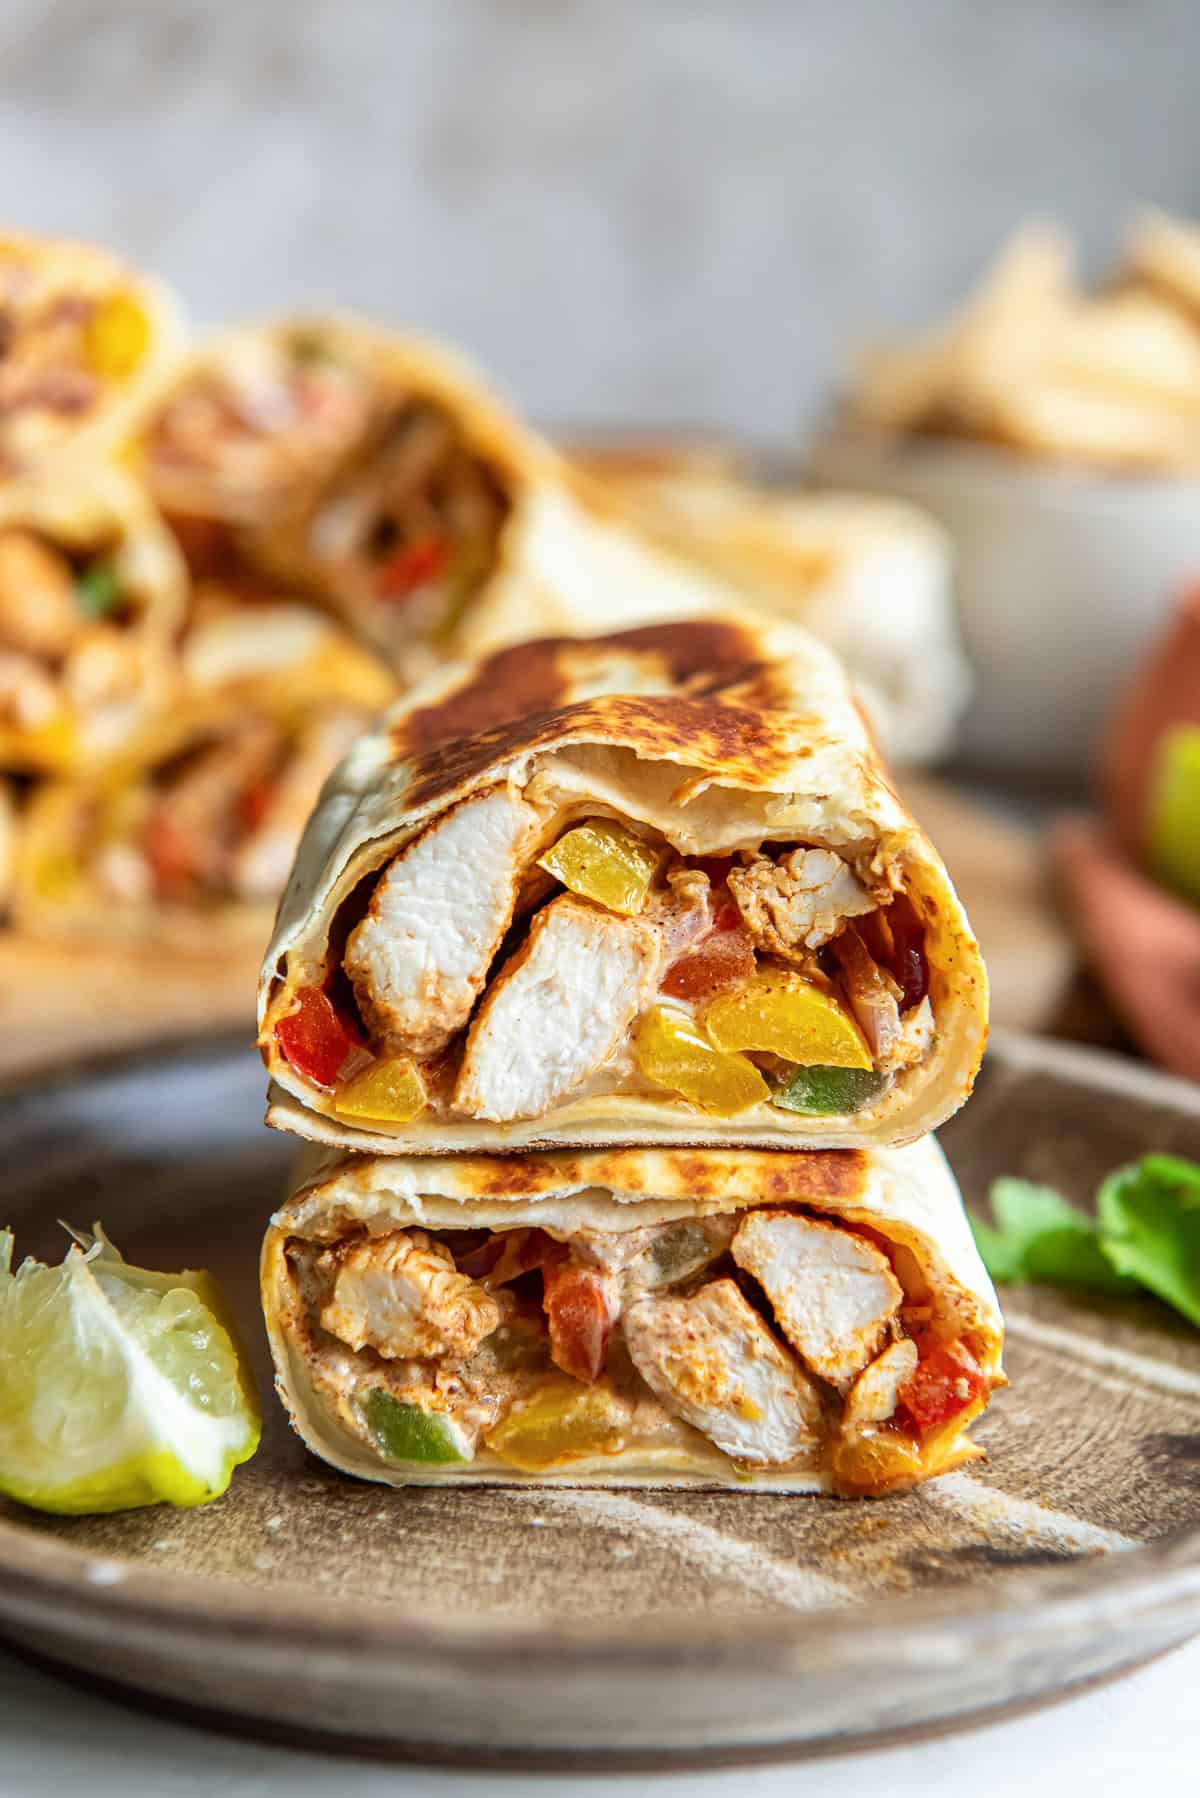
These crunchy chicken fajita wraps are stuffed with onions, peppers and cheese, topped with a creamy, flavorful sauce before toasting in the frying pan. They are easy to make and guaranteed to be family friendly!
I’ve been going through a wrap phase for a diner recently. There are so many ways to stuff tortillas. Or, for my husband and I, it’s a low-carb wrap. It’s just not old and they’re very low stress and easy meals.
Spin between California Crab Wrap, Chicken Bacon Lunch Wrap, and these super satisfying chicken fajita Wrap.
What sets these delicious wraps apart is that the tortillas are toasted in a frying pan until they are golden and crisp. It adds a flavourful touch that I really love. They have all the heat of classic chicken fajitas wrapped and wrapped for a quick dinner.
Ingredient Notes
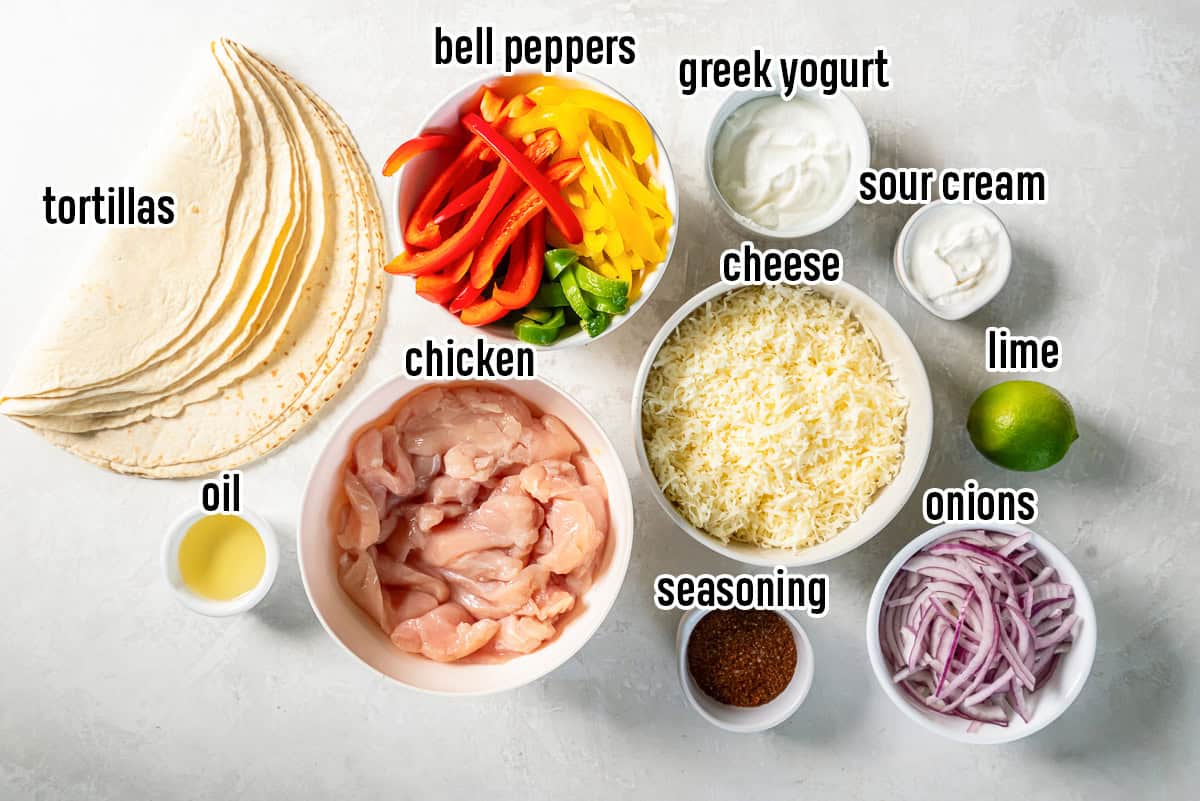
Chicken: Boneless, skinless chicken breast sliced into strips. Vegetables: Thinly sliced peppers of red onions in various colours. I love using yellow and red peppers. This is mild and sweet with a mild flavor, and always adds a little green pepper to add a bolder flavour. It’s all good! Seasonings: I use a homemade fajita seasoning mix that includes a blend of dried spices and a touch of brown sugar to help add color and carmelize the chicken a bit. Making your own at home is a great way to control the amount of salt in your recipes. If necessary, feel free to contact us with store-bought seasoning mixes. Lime: You need lime, halved and skinned. Cheese: Shredded Monterey Jack cheese works well here, but feel free to replace it with cheddar. Tortillas: If you’re looking at large (burrito size) flour tortillas or carbs, I do these with low carb wraps, but they’re great! For sauce: 2% or non-fat plain Greek yogurt, sour cream, fresh lime juice and crust, and a small fajita seasoning mix.
How to make chicken fajita wrap
Here’s a quick overview of how to create this recipe. The recipe card at the end of this post has detailed instructions.
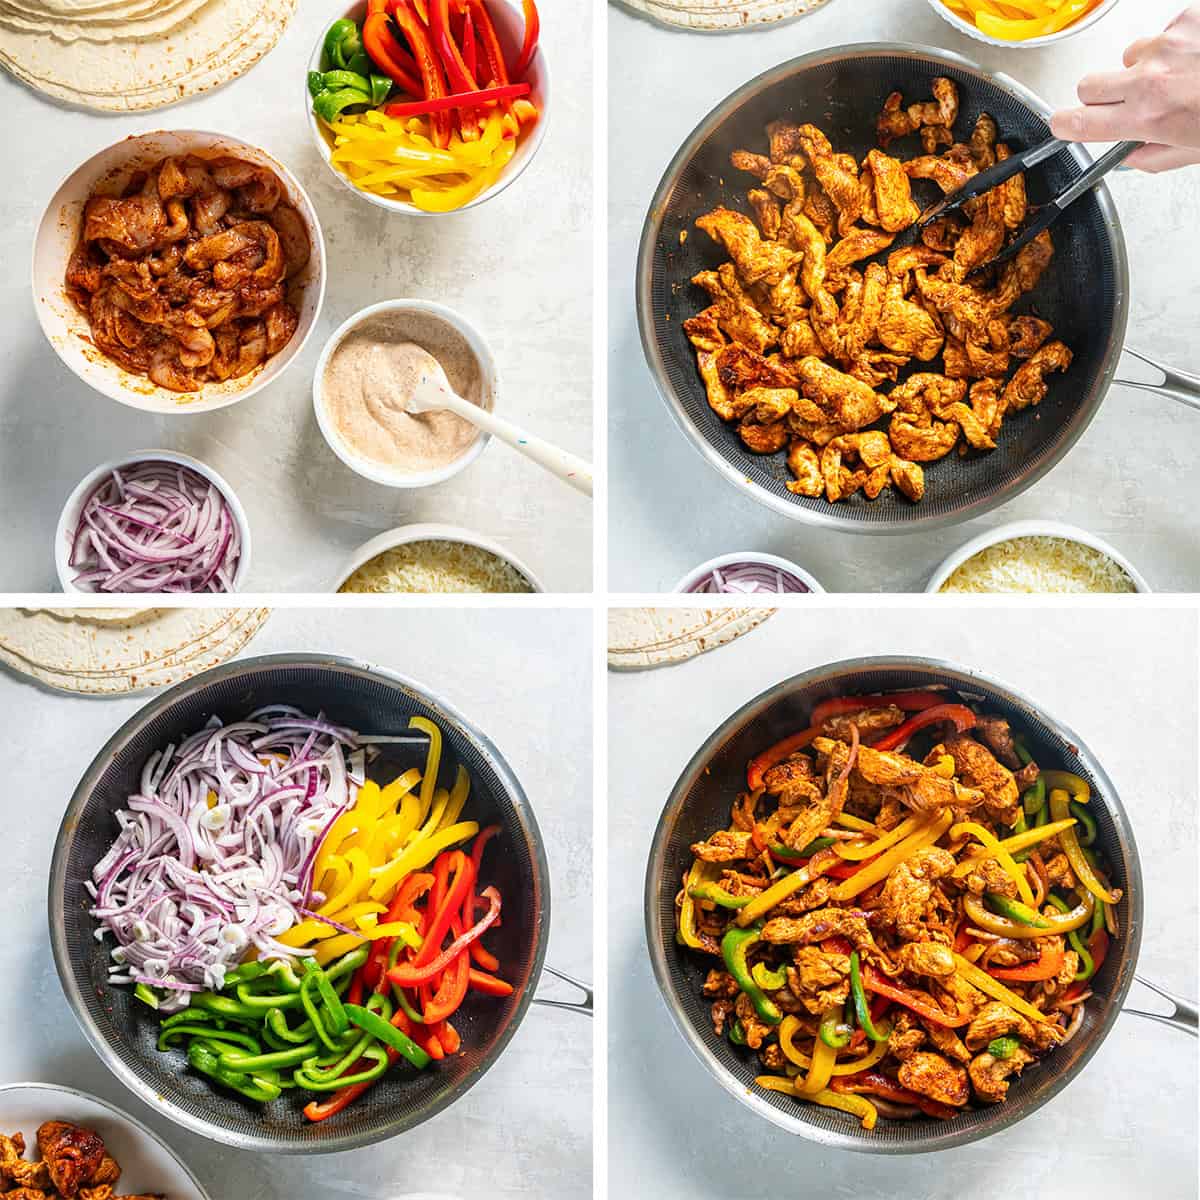
While slices of vegetables and making sauce, marinate the chicken strips easily with a bit of oil, lime juice and fajita seasonings. Next, turn the oily frying pan over the chicken until cooked. Transfer it to a bowl and set aside. Then saute the vegetables in a little more oil until they are tender. Finish the stuffing by combining chicken and vegetables.
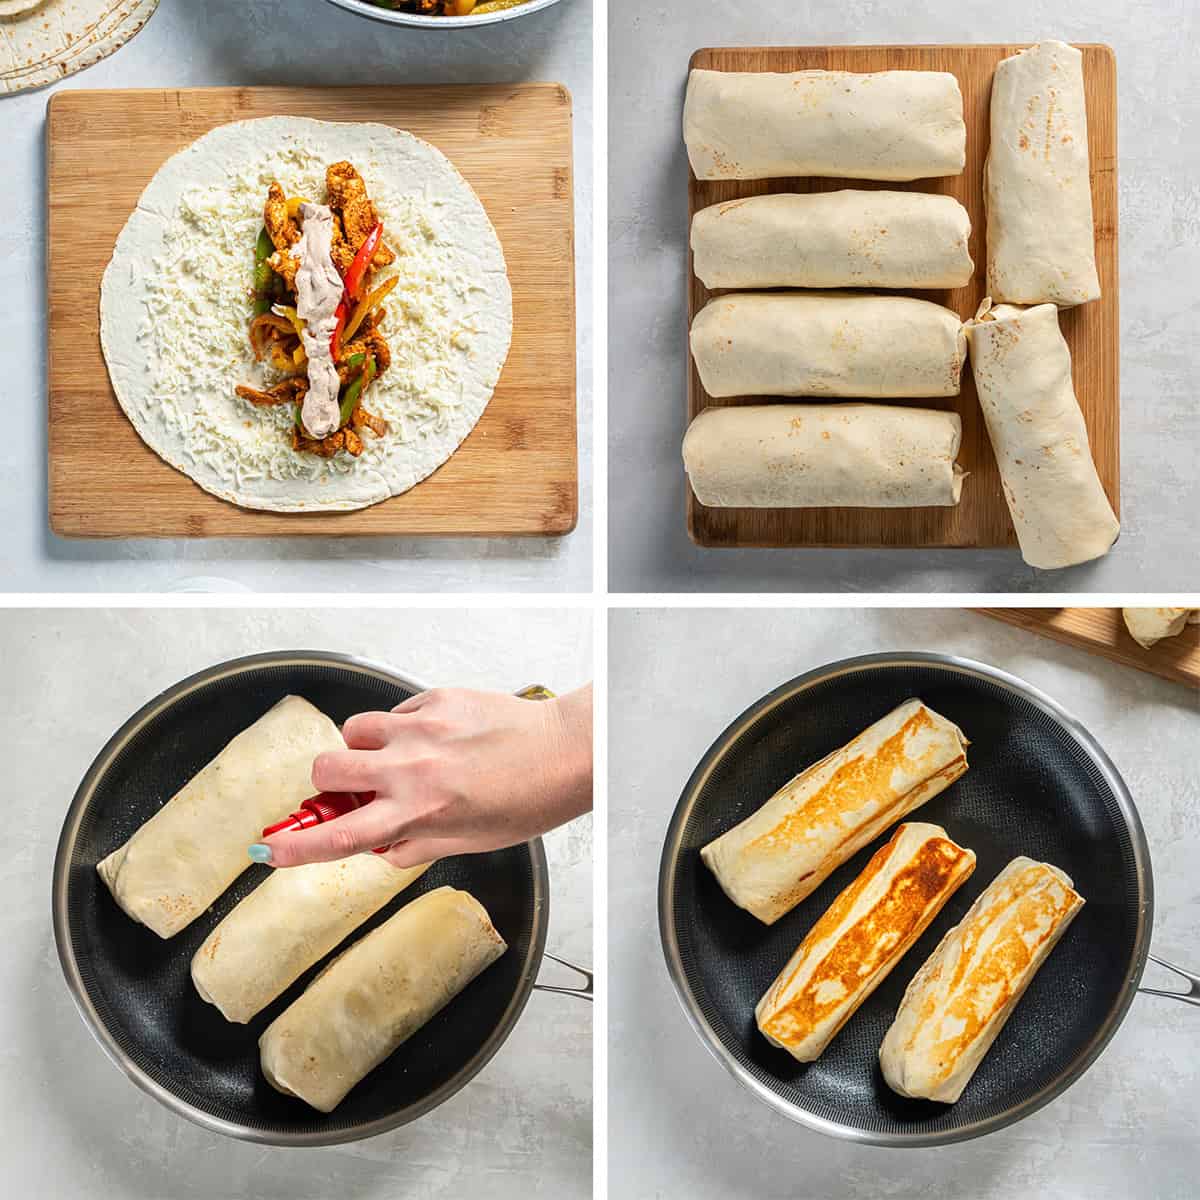
Assemble the wrap with cheese, stuffed chicken fajitas and drizzle in sauce. Fold the edges of the tortilla and roll it up firmly. You need enough filling to create six substantial wraps. Coat a clean frying pan with non-stick cooking spray, add as much wrap as possible without touching it, and spray a little extra non-stick spray on the top. Cook by flipping the other side until golden brown.
Pro tips
Sprinkle cheese over the tortilla and within ½ inch of the edge (not just down the center). This increases the chances of sealing the plastic wrap while cooking and leaving it closed in the frying pan.
Makeup and storage tips
Want to get a head start? You can slice the peppers and onions a day or two beforehand and store in an airtight container in the fridge. Chicken can also be marinated in advance. Please note that the marinade contains lime juice. Approximately 2-6 hours is perfect for flavor without affecting the texture of the meat.
The remaining wrap can be stored in the fridge for up to 3 days. For best results, reheat them in a frying pan to regain that crisp tortilla. If the wrap is really cold, first place it in the microwave for 30-45 seconds to warm up the stuffing, then finish in the pan and it’s crispy without being too brown.
Cooked stuffing reheats well on its own if you prefer to assemble fresh wrap later. Transfer to an airtight container and refrigerate for up to 3 days.
Sign up for our free newsletter of all the latest recipes and join FacebookInstagram and pinterest For more cooking inspiration!

Chicken Fajita Wrap
These crunchy chicken fajita wraps are stuffed with onions, peppers and cheese, topped with a creamy, flavorful sauce before toasting in the frying pan. They are easy to make and guaranteed to be family friendly!
material
Instructions
Prepare chicken, vegetables and sauce
Slice the chicken into thin, short strips. Place in a bowl and add 3 tablespoons of olive oil, half the juice of lime, and 2 tablespoons of fajita seasoning. If you continue, save it, cover for up to 6 hours and refrigerate.
Slice the peppers into thin 2-inch strips. Slice the red onion in half and slice thinly. Please put it aside.
For the sauce, combine Greek yogurt, sour cream, teageta teeta seasonings, the remaining half of the lime juice, and 1 teaspoon of lime peel. Refrigerate the plastic wrap until ready to assemble.
Cook chicken fajita mixture
Place a large non-stick frying pan over medium heat. Add the chicken and spread it on the bottom of a frying pan. Cook uninterrupted for about 2 minutes, then continue cooking, until occasionally brown, about 5-6 minutes, or until the chicken is almost cooked juice. Transfer the chicken to a large plate or bowl and set aside.
Add the remaining 1 tablespoon of olive oil to an empty skillet and add the sliced peppers and onions. Cook for 4-5 minutes, stirring occasionally, or over medium heat, or until the vegetables are tender. If necessary, reduce the heat under the frying pan as needed to avoid burning. Transfer the vegetables to a plate along with the chicken and mix. Set the frying pan aside and let it cool.
Assemble the wrap
Place the tortillas on a cutting board and scatter about ¼ cup (or more) of cheese within ½ inch of the edge. Add the chicken fajita mixture in the center and bottom, and 2 tablespoons of sauce on top. Push the sides of the tortilla in and roll it up firmly. Repeat to assemble the remaining wrap.
Once the frying pan is cool enough to handle, wash and dry immediately.
Turn the wrap brown
Apply generously in a clean frying pan with non-stick cooking spray and heat over medium heat. Place a few wraps (so that fits comfortably without touching) on the seam side of the pan and cook until golden. Coat the top of the wrap with a bit of non-stick cooking spray and use kitchen tongs to turn all sides over and brown. Transfer to a cutting board and cook the remaining plastic wrap.
Slice in half and serve.
Note
The remaining wrap can be stored in the fridge for up to 3 days. For best results, reheat them in a frying pan to regain that crisp tortilla. If the wrap is really cold, first place it in the microwave for 30-45 seconds to warm up the stuffing, then finish in the pan and it’s crispy without being too brown.
Cooked stuffing reheats well on its own if you prefer to assemble fresh wrap later. Transfer to an airtight container and refrigerate for up to 3 days.
nutrition
Serving: 1 Wrap ・ calorie: 348 kcal ・ carbohydrates: 9 g ・ protein: 32 g ・ fat: twenty one g ・ Saturated fat: 7 g ・ Polyunsaturated fat: 2 g ・ January Saturated Fat: 10 g ・ Trans Fat: 0.01 g ・ cholesterol: 96 mg ・ sodium: 668 mg ・ potassium: 669 mg ・ fiber: 2 g ・ sugar: 5 g ・ Vitamin A: 2443 iu ・ Vitamin C: 76 mg ・ calcium: 200 mg ・ iron: 2 mg
Nutrition information is automatically calculated using common ingredients and is an estimate rather than a guarantee. See the home ingredients label for more accurate results.
(TagStoTRASSLATE) Chicken (T) Vegetables