
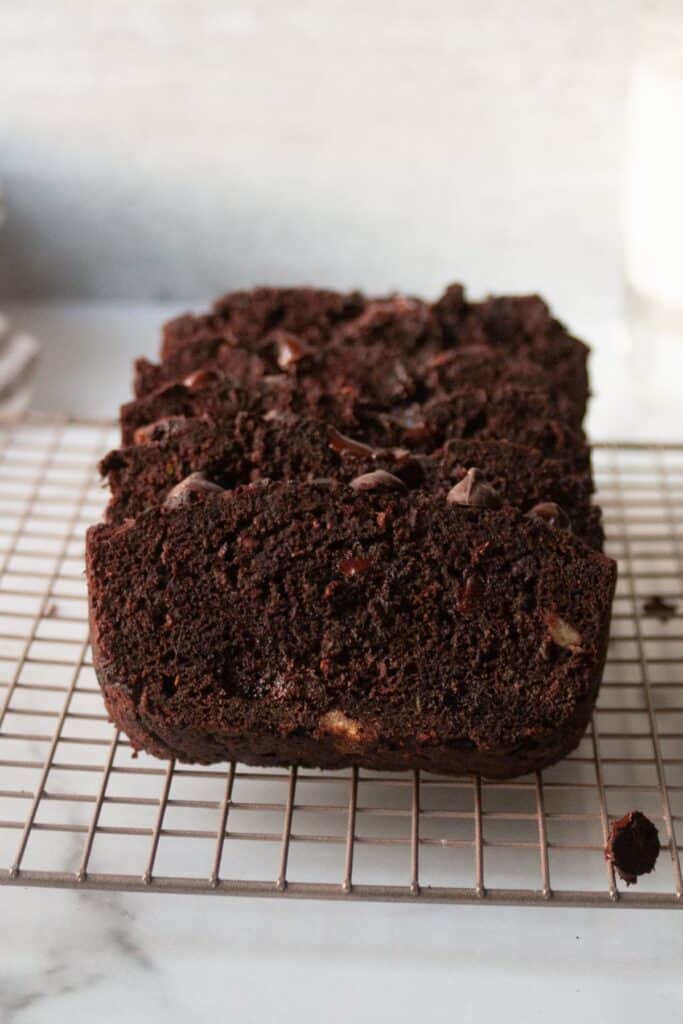
This chocolate loaf cake is an easy recipe for beginners that is super fluffy, incredibly moist, and stays soft for days thanks to a simple apple cider vinegar trick that makes a big difference. This recipe is vegan and dairy-free, but you can’t even tell it apart from other chocolate cakes that use eggs or dairy.
We’ve made tons of vegan chocolate desserts on this site, from our popular vegan chocolate cake to oatmeal baked chocolate brownies and even chocolate peanut butter truffles.
But requests for something simpler continued. Things that can be sliced and served without much effort…
So this time we will introduce chocolate cake!
What I like most is how forgiving this recipe is. No mixer. No creamed butter. All you need is two bowls, a whisk, and about 10 minutes of prep before putting it in the oven.
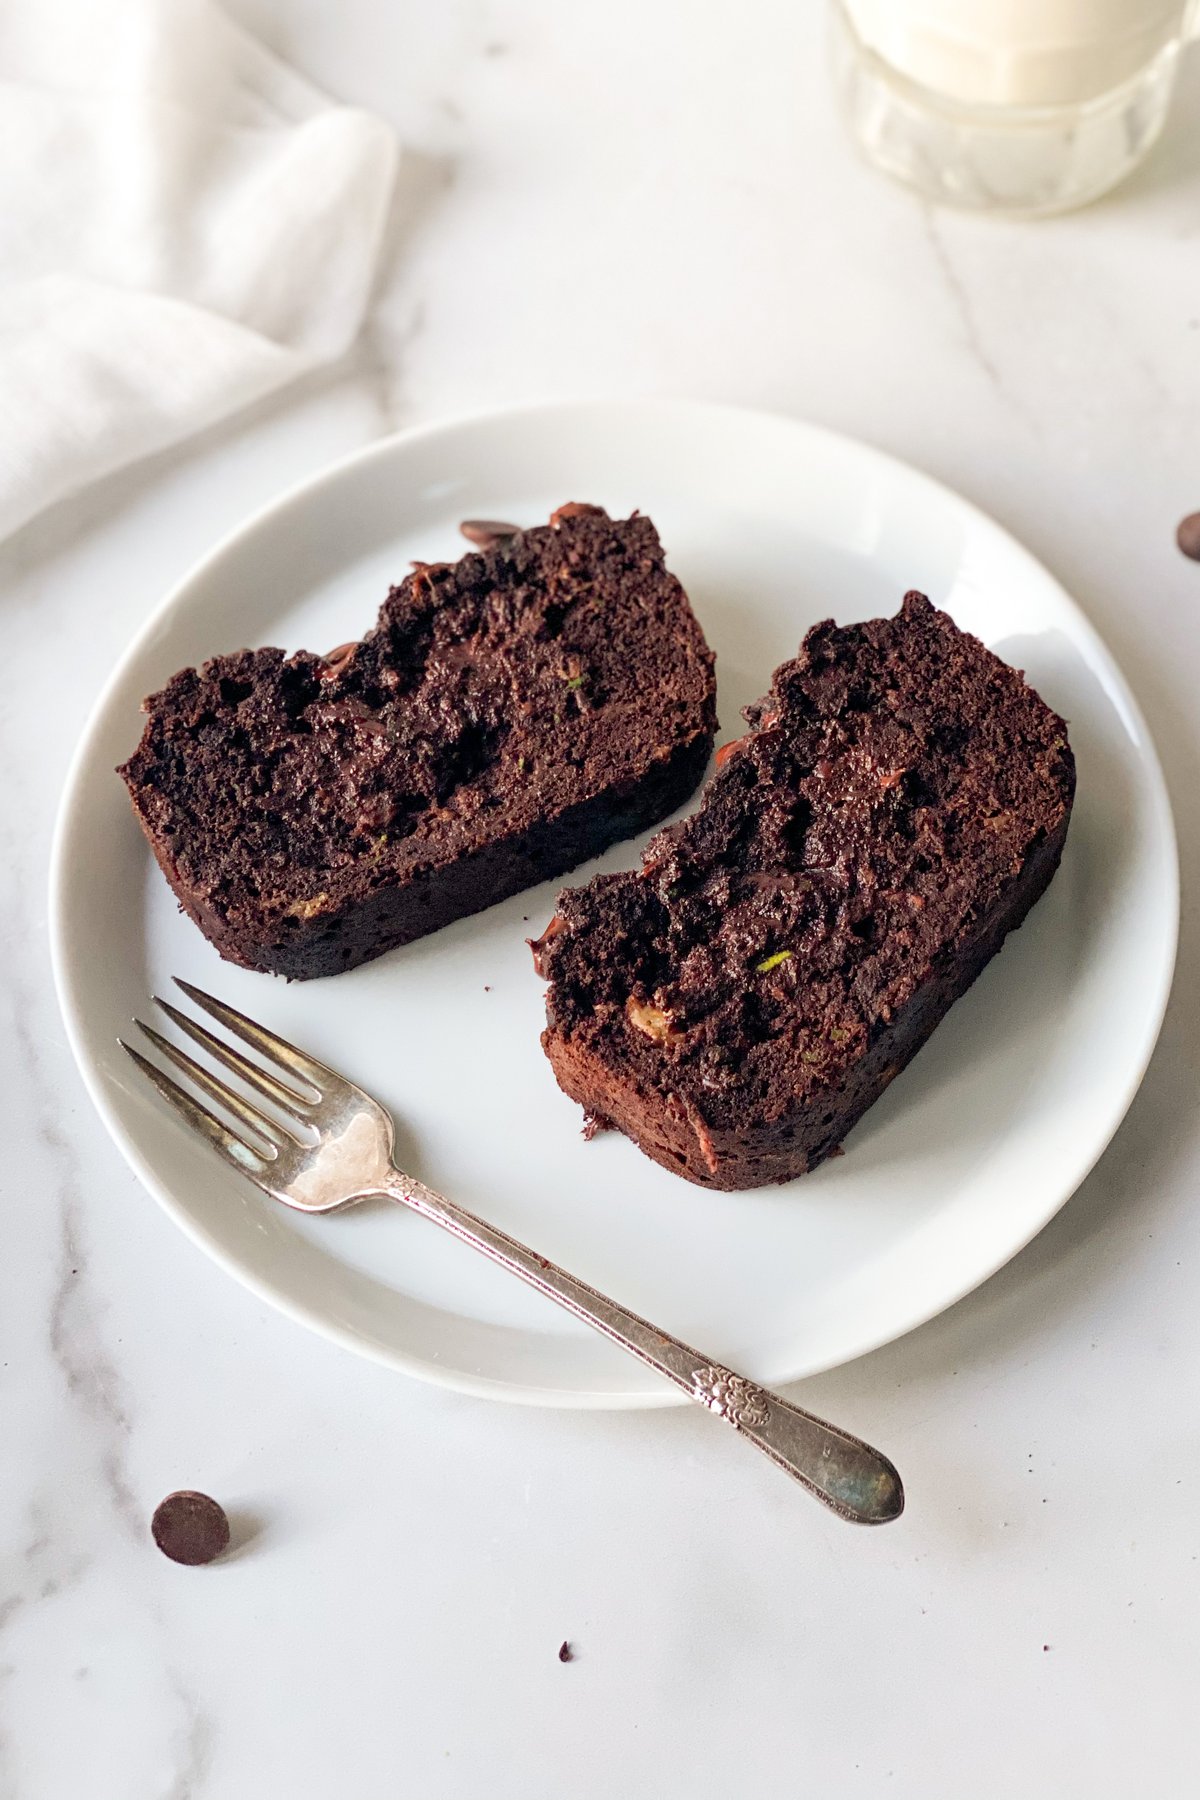
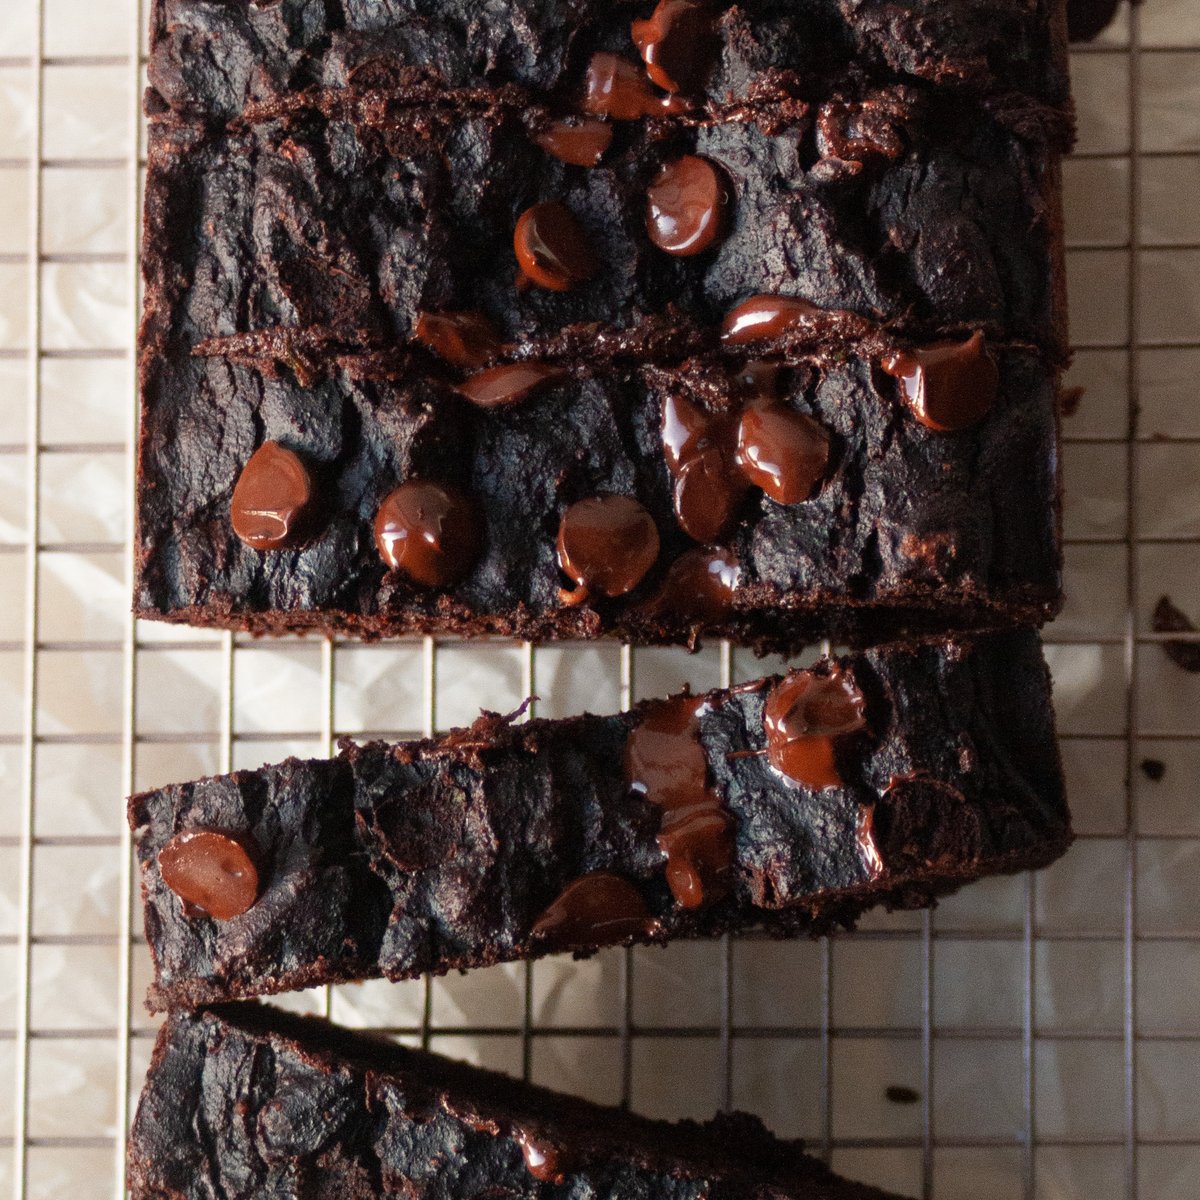
The texture is somewhere between a chocolate pound cake and a fluffy brownie. It’s rich enough to feel luxurious, but light enough to make you want a second slice.
Ingredient notes and substitutions
See recipe card below for complete measurements and instructions.
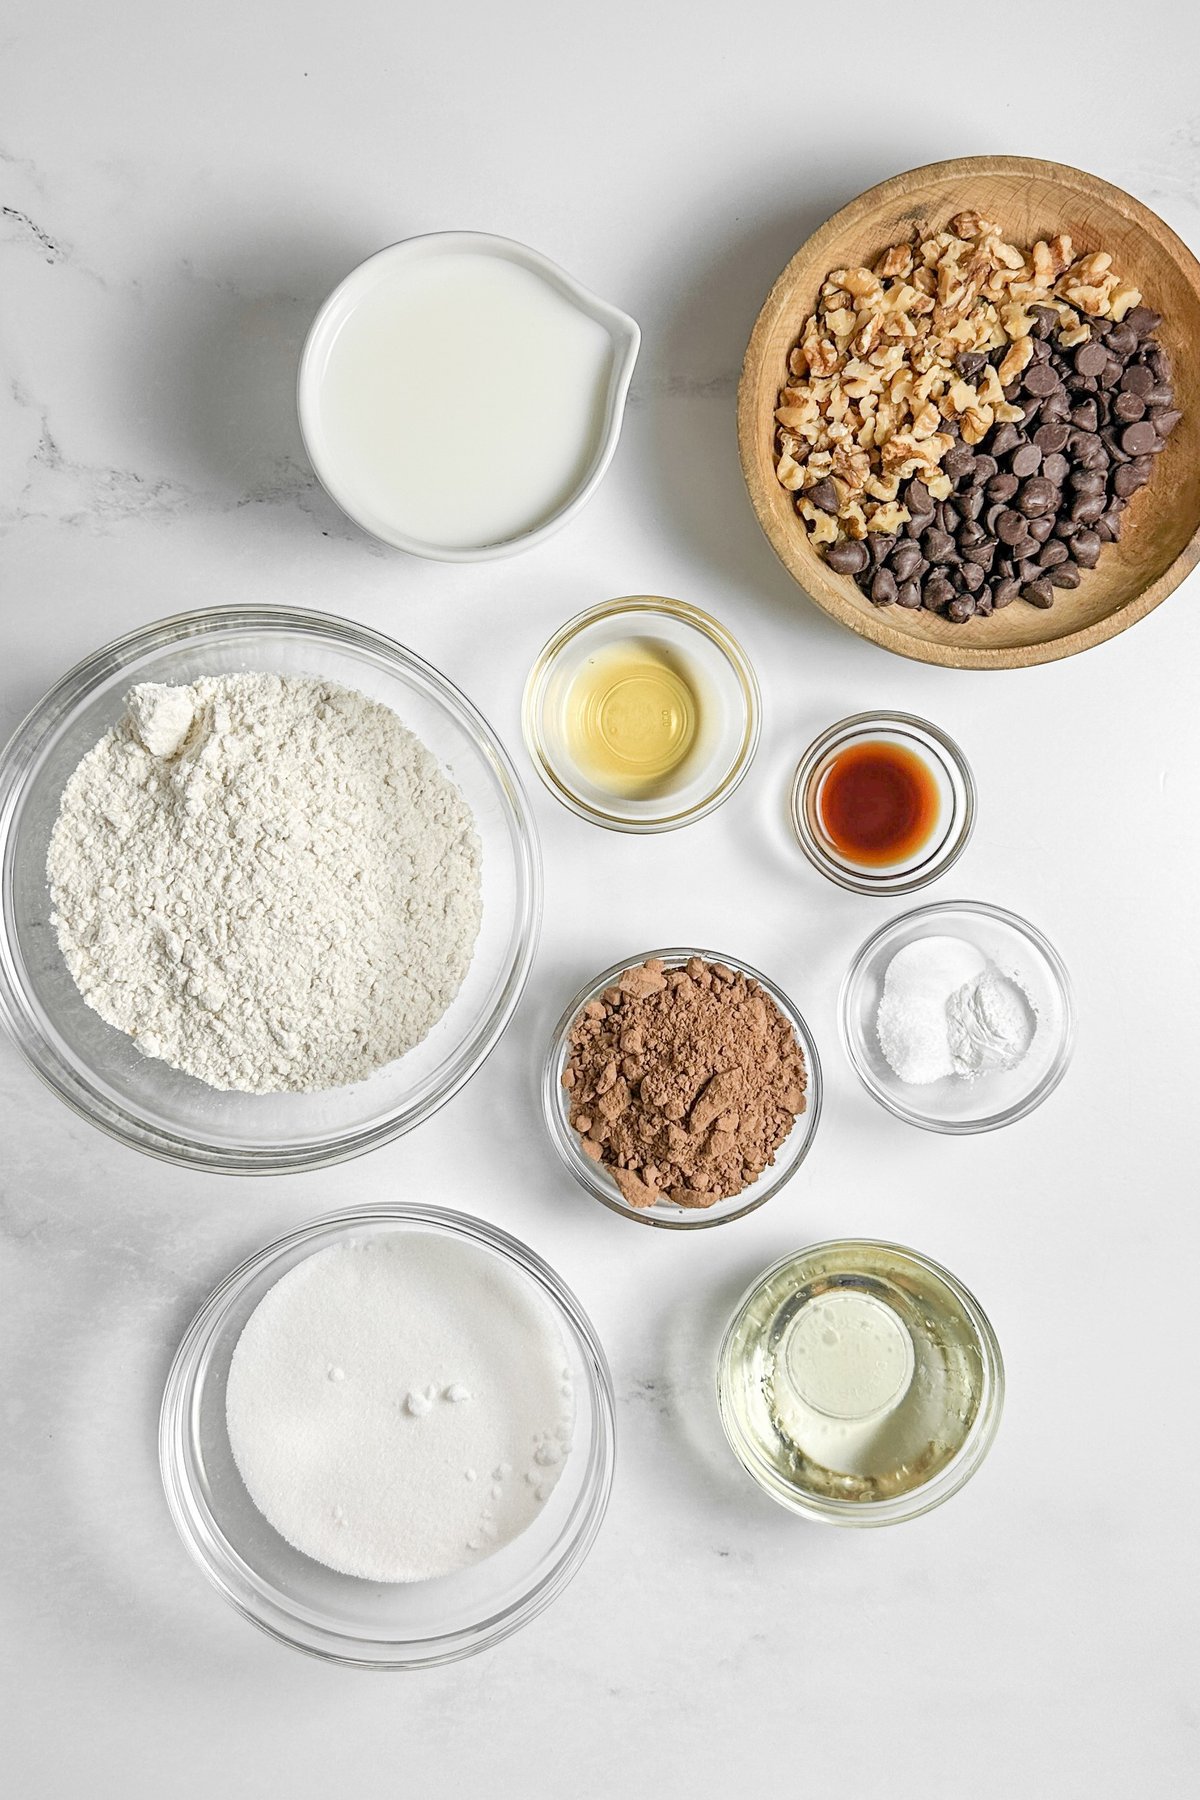
Cocoa powder: Use unsweetened natural cocoa powder for the best rise and flavor. You can also use Dutch-process cocoa, but it reacts differently with the baking soda and may leave the bread a little flat.
Apple cider vinegar: Reacts with the baking soda to create lift and softness, keeping the cake moist for several days.
Plant-based milk: I often use unsweetened almond milk, but oat milk or soy milk will work just as well.
Vegetable oil: Keeps crumbs moist without dairy. If you prefer, you can replace it with melted coconut oil, which may add a slight coconut flavor.
Dairy-free chocolate chips: Stir this into the batter to create pockets of melty chocolate throughout. Look for brands that clearly state dairy-free.
Chopped walnuts (optional): This adds a nice crunch and makes the bread feel heartier. Skip it for the nut-free version.
How to make easy chocolate loaf cake
First, preheat your oven to 350°F or 175°C.
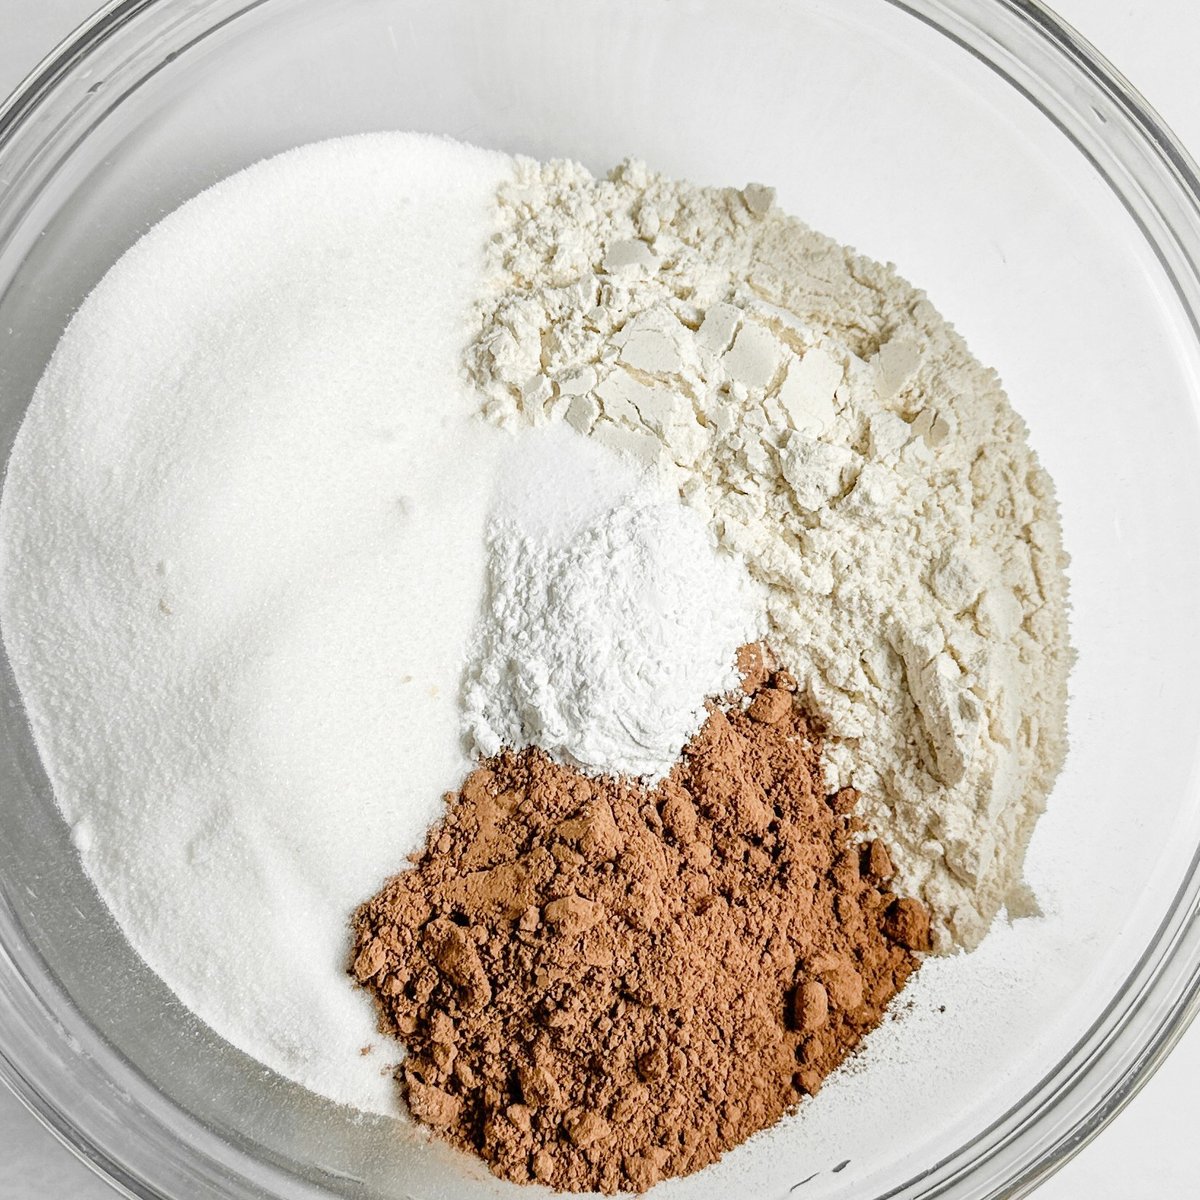
Step 1: Mix dry ingredients. Combine flour, cocoa powder, sugar, baking powder, baking soda, and salt in a large bowl. Make sure there are no lumps in the cocoa powder.
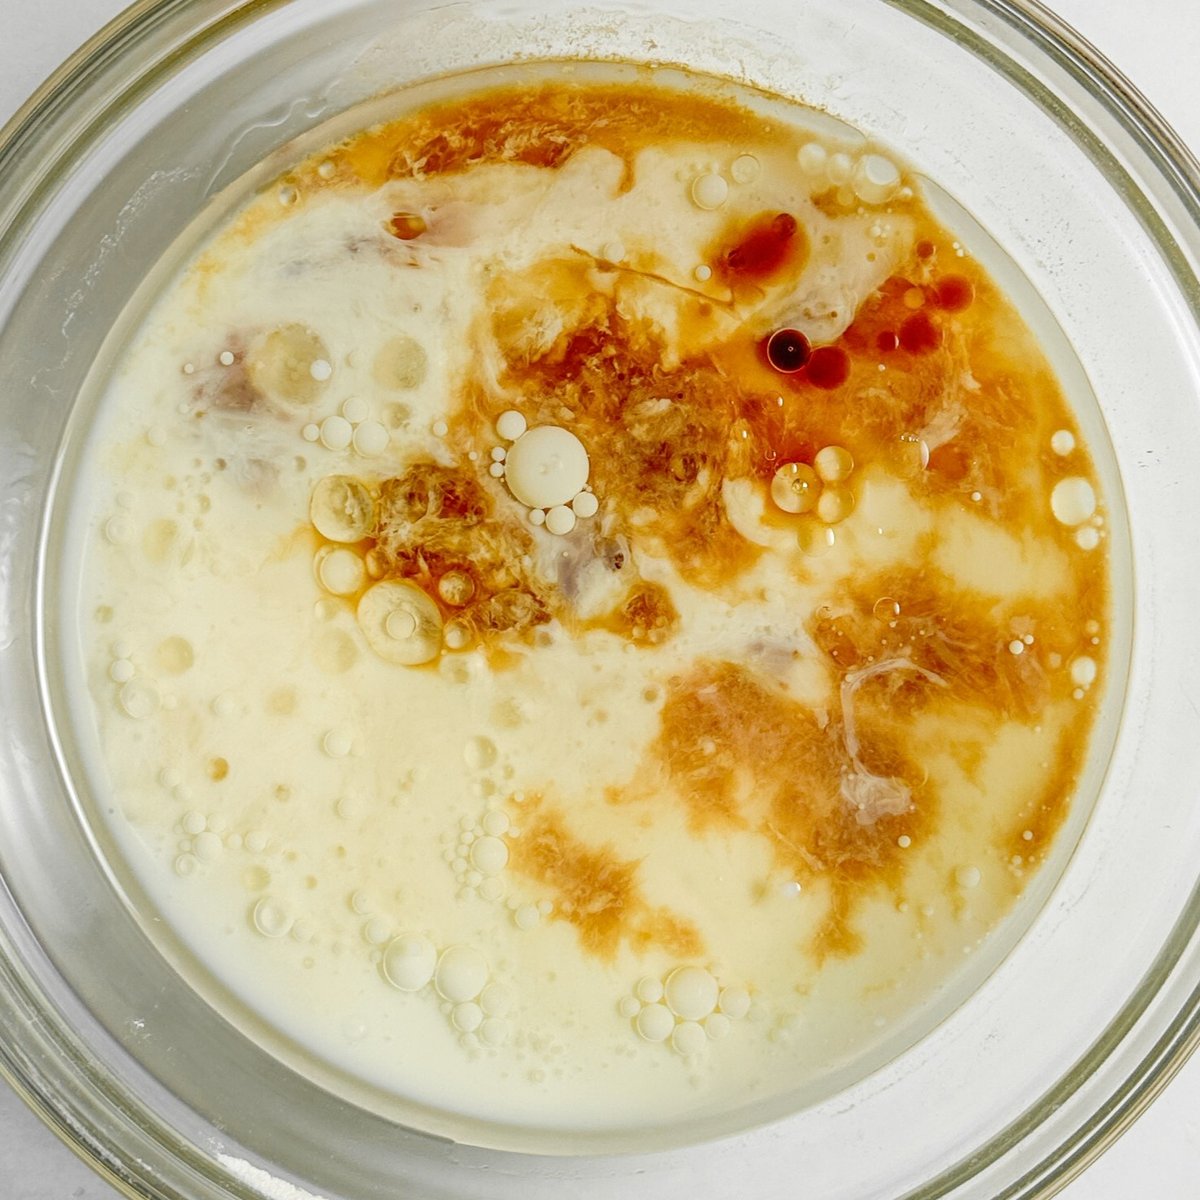
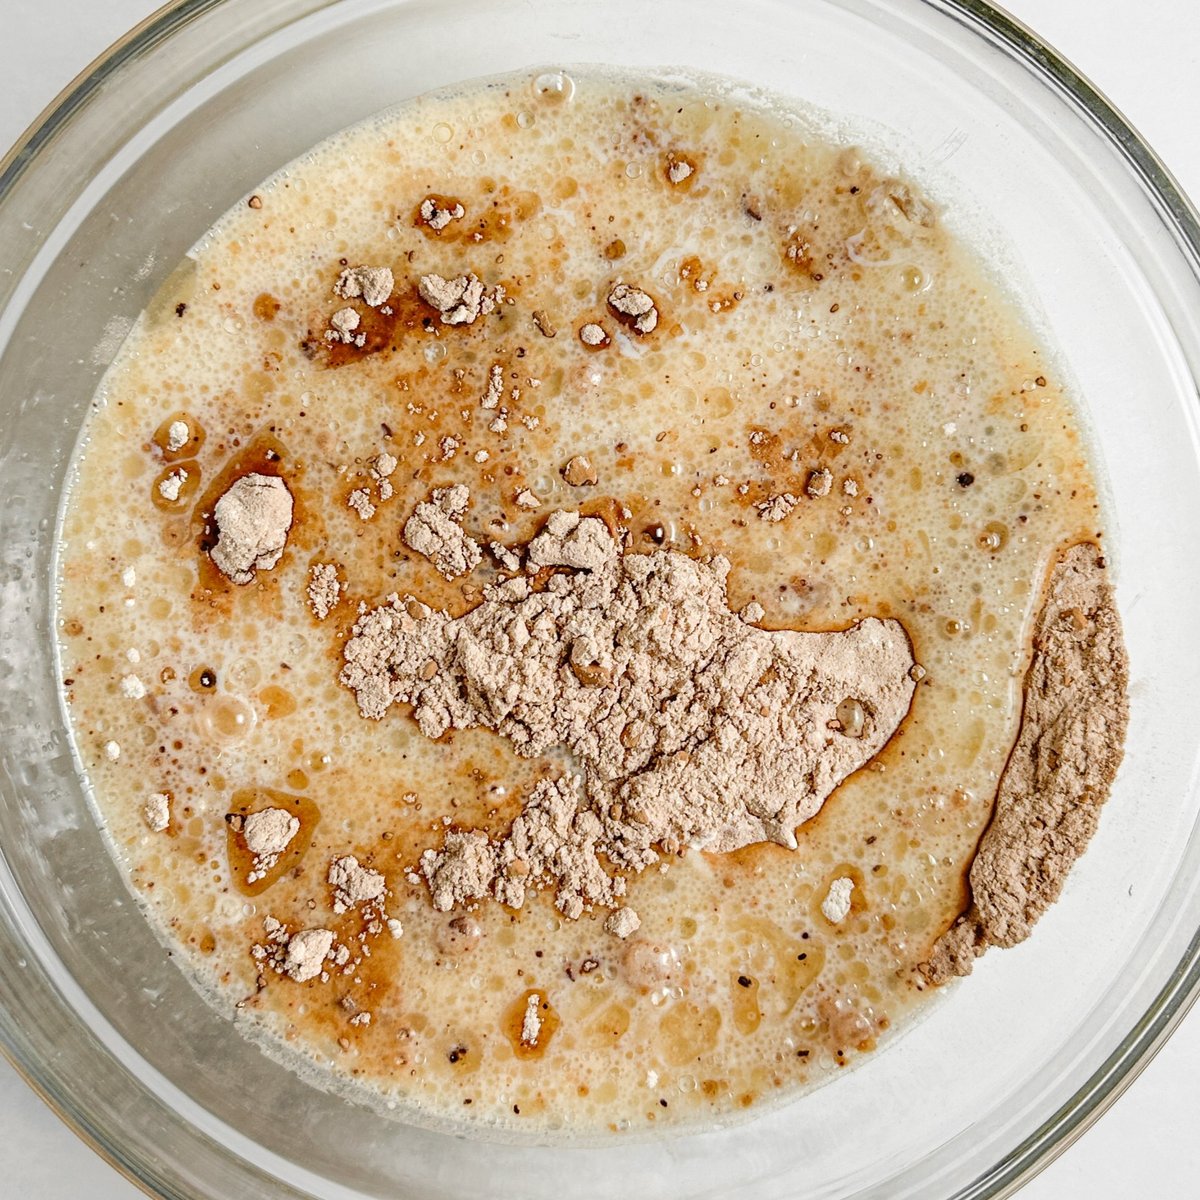
Step 2: Mix the wet ingredients together. In a separate bowl, combine almond milk, vegetable oil, vanilla extract, and apple cider vinegar. You can see that it is starting to harden slightly. That’s exactly what you want.
Step 3: Combine wet and dry. Pour the wet ingredients into the dry ingredients. Stir until just combined. It’s okay if there are a few small lumps. If you mix too much, the bread will become hard.
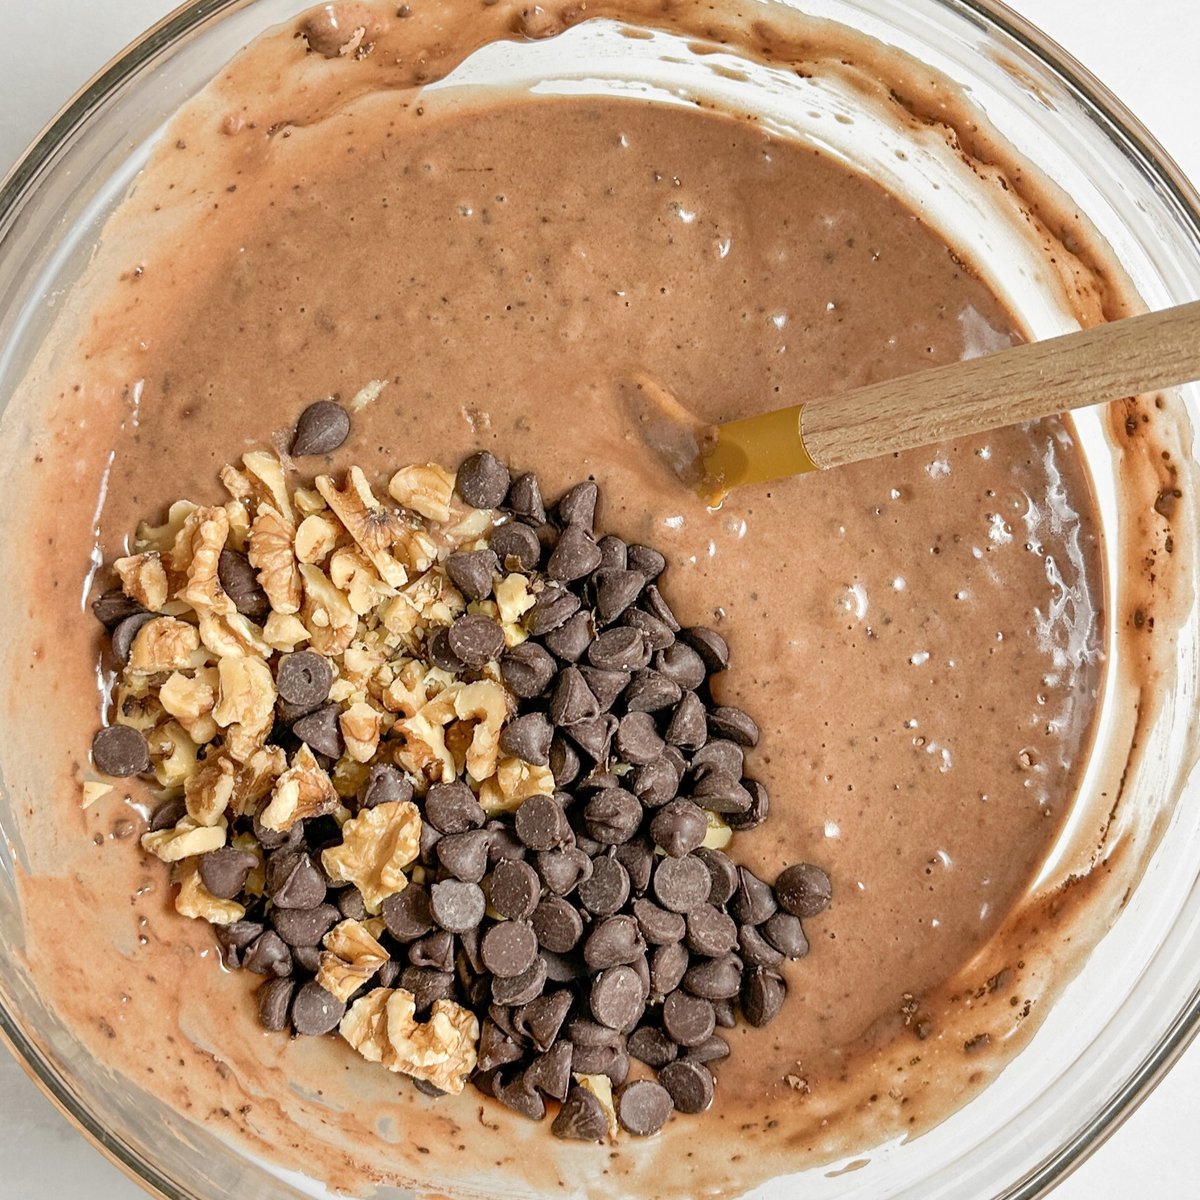
Step 4: Add mixins. If using dairy-free chocolate chips and chopped nuts, gently add them. For a nicer finish, set aside a few chocolate chips to press on top before baking.

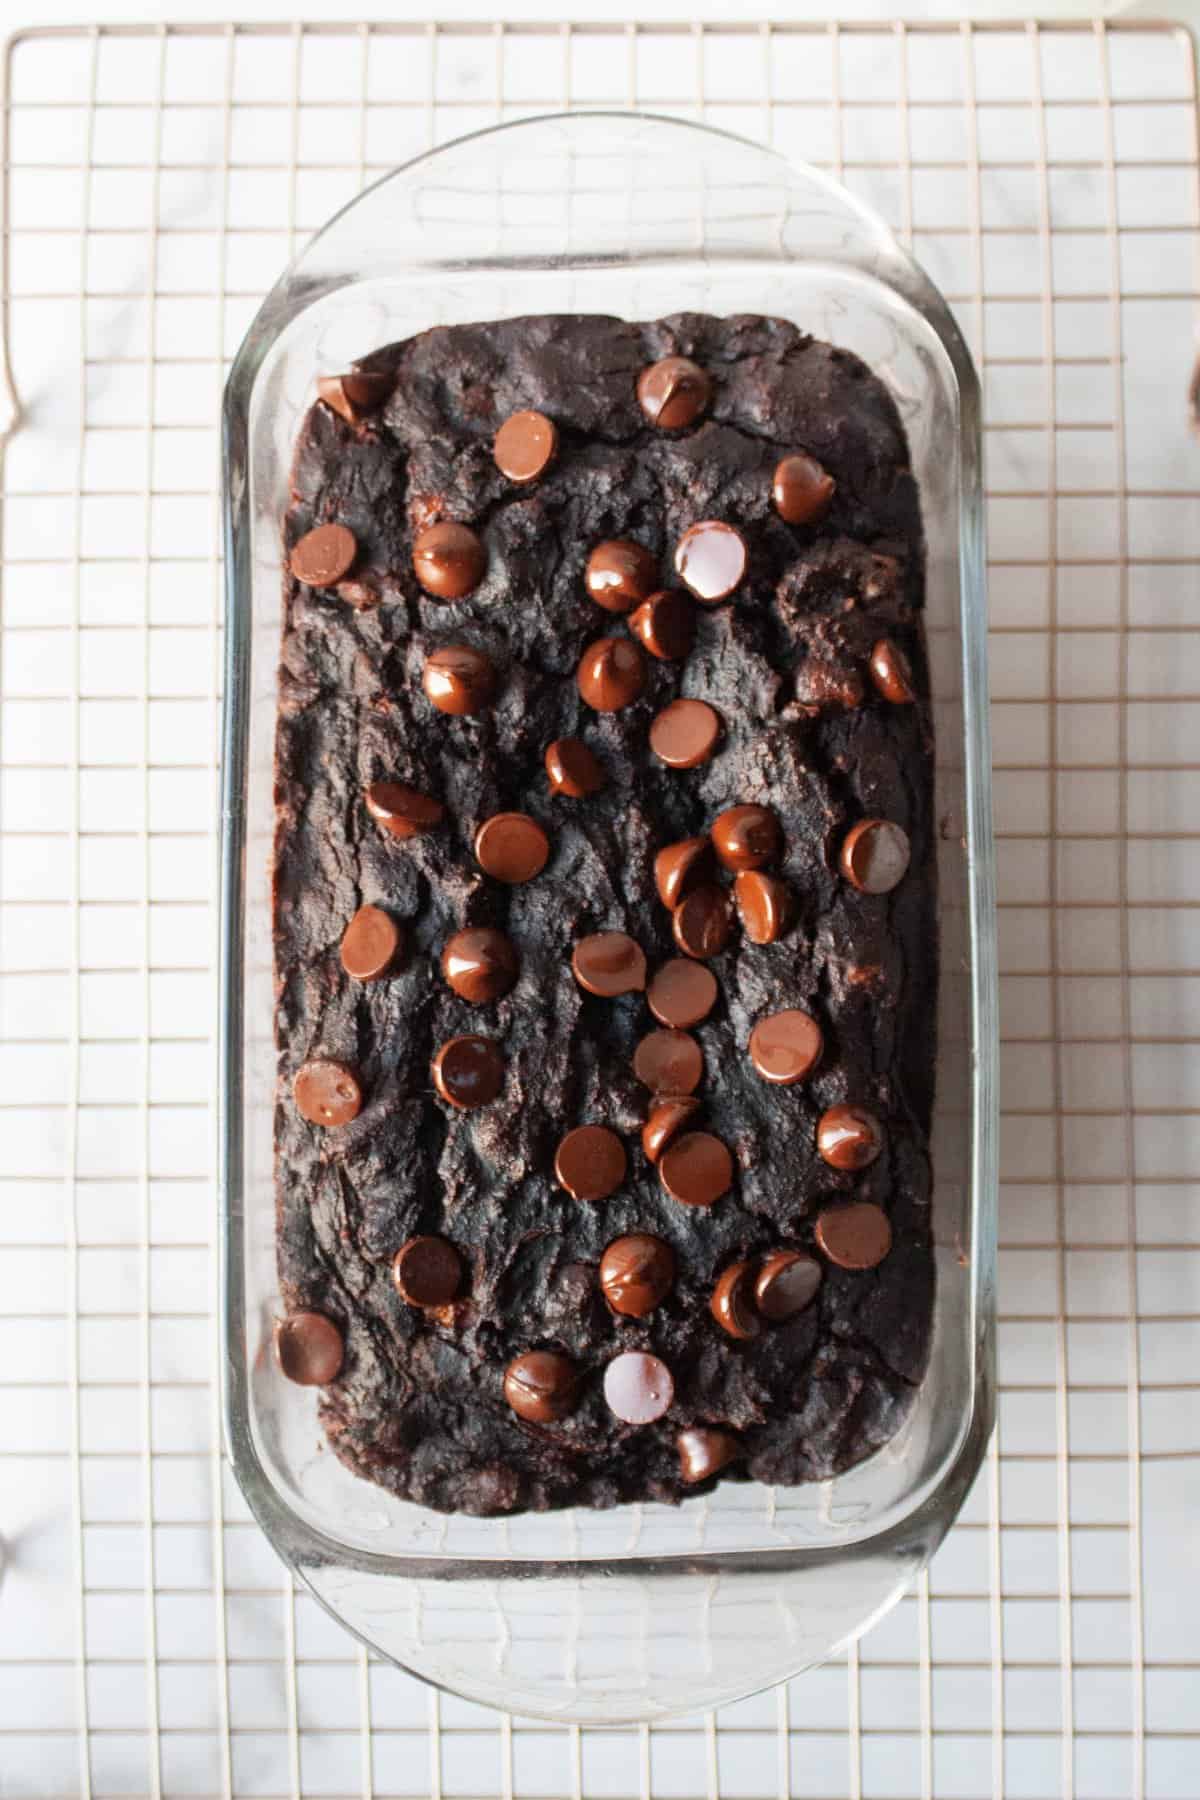
Step 5: Bake. Pour batter into a greased or parchment paper-lined 9 x 5-inch loaf pan. Spread evenly and bake at 350°F for 50-60 minutes. When you insert a toothpick into the center, you should see a few moist crumbs come out.
Step 6: Cool completely. Let the bread cool in the pan for 10 minutes, then transfer to a wire rack. If you slice it before it has completely cooled, it will have a rubbery texture.
Tips for making the best chocolate loaf cake
Use room temperature ingredients. Using cold almond milk may cause the oil to curdle slightly. Bringing everything to room temperature will give you a smoother dough.
Let it sit overnight. In fact, this bread is even better the next day. The flavor deepens and the texture becomes even fluffier.
offer suggestions
Spread the slices with almond butter and enjoy for breakfast or an afternoon snack. For dessert, warm the slices and top with coconut whipped cream.
This bread also makes a great homemade gift. Wrap it in parchment, tie it with twine, and include a note with storage instructions.
For a more decadent version, sprinkle with melted dairy-free chocolate after cooling. The contrast between a matte cake and a glossy drizzle looks impressive with minimal effort.
FAQ
I haven’t tested this recipe with gluten-free flour, but it should work fine if you use a 1:1 gluten-free baking blend. The texture may be a little thicker. If you want a tested gluten-free chocolate option, try my vegan strawberry cake, which is naturally gluten-free.
This usually happens due to opening the oven too early or under-baking. Check doneness with a toothpick before removing. There should be only a few moist crumbs stuck to the center.
Store in an airtight container at room temperature for up to 5 days. For long-term storage, wrap tightly in plastic wrap and freeze for up to 3 months. Thaw at room temperature before serving.
A 9×5 inch loaf pan is ideal. You can also use an 8×4-inch pan, but the loaf will be taller and the baking time will be longer (10 to 15 minutes more). You can also bake in a 9-inch round cake pan for about 35-40 minutes.
See more chocolate recipes
If you like chocolate desserts, try my other favorites too.
See more vegan cake recipes
Looking for more easy vegan cakes? Here are our readers’ favorites:
recipe card
Quantity: 10 slice
Instructions
Preheat oven to 350°F (175°C). Lightly grease or line a 9-by-5-inch loaf pan with parchment paper.
In a large mixing bowl, combine flour, cocoa powder, sugar, baking powder, baking soda, and salt until well combined.
In a separate bowl, combine almond milk, vegetable oil, vanilla extract, and apple cider vinegar. Mix well.
Pour the wet ingredients into the dry ingredients. Stir until just combined, being careful not to overmix.
Gently add dairy-free chocolate chips and chopped nuts (if using).
Pour the batter into the prepared loaf pan and spread it out evenly.
Bake in the preheated oven for 50 to 60 minutes, or until a toothpick inserted in the center comes out clean with just a few moist crumbs remaining.
Let the chocolate bread cool in the mold for about 10 minutes. Then remove from the pan and let cool completely on a wire rack.
Once cool, slice the bread and enjoy. Enjoy as is or with vegan or nut butter.
Precautions
Leftover cake can be stored in an airtight container at room temperature for 3 to 5 days or in the refrigerator for up to a week. The nut is optional and can be omitted for the nutless version.
©See, learn, and eat. All content and images are copyrighted and may not be used or republished without prior permission.