
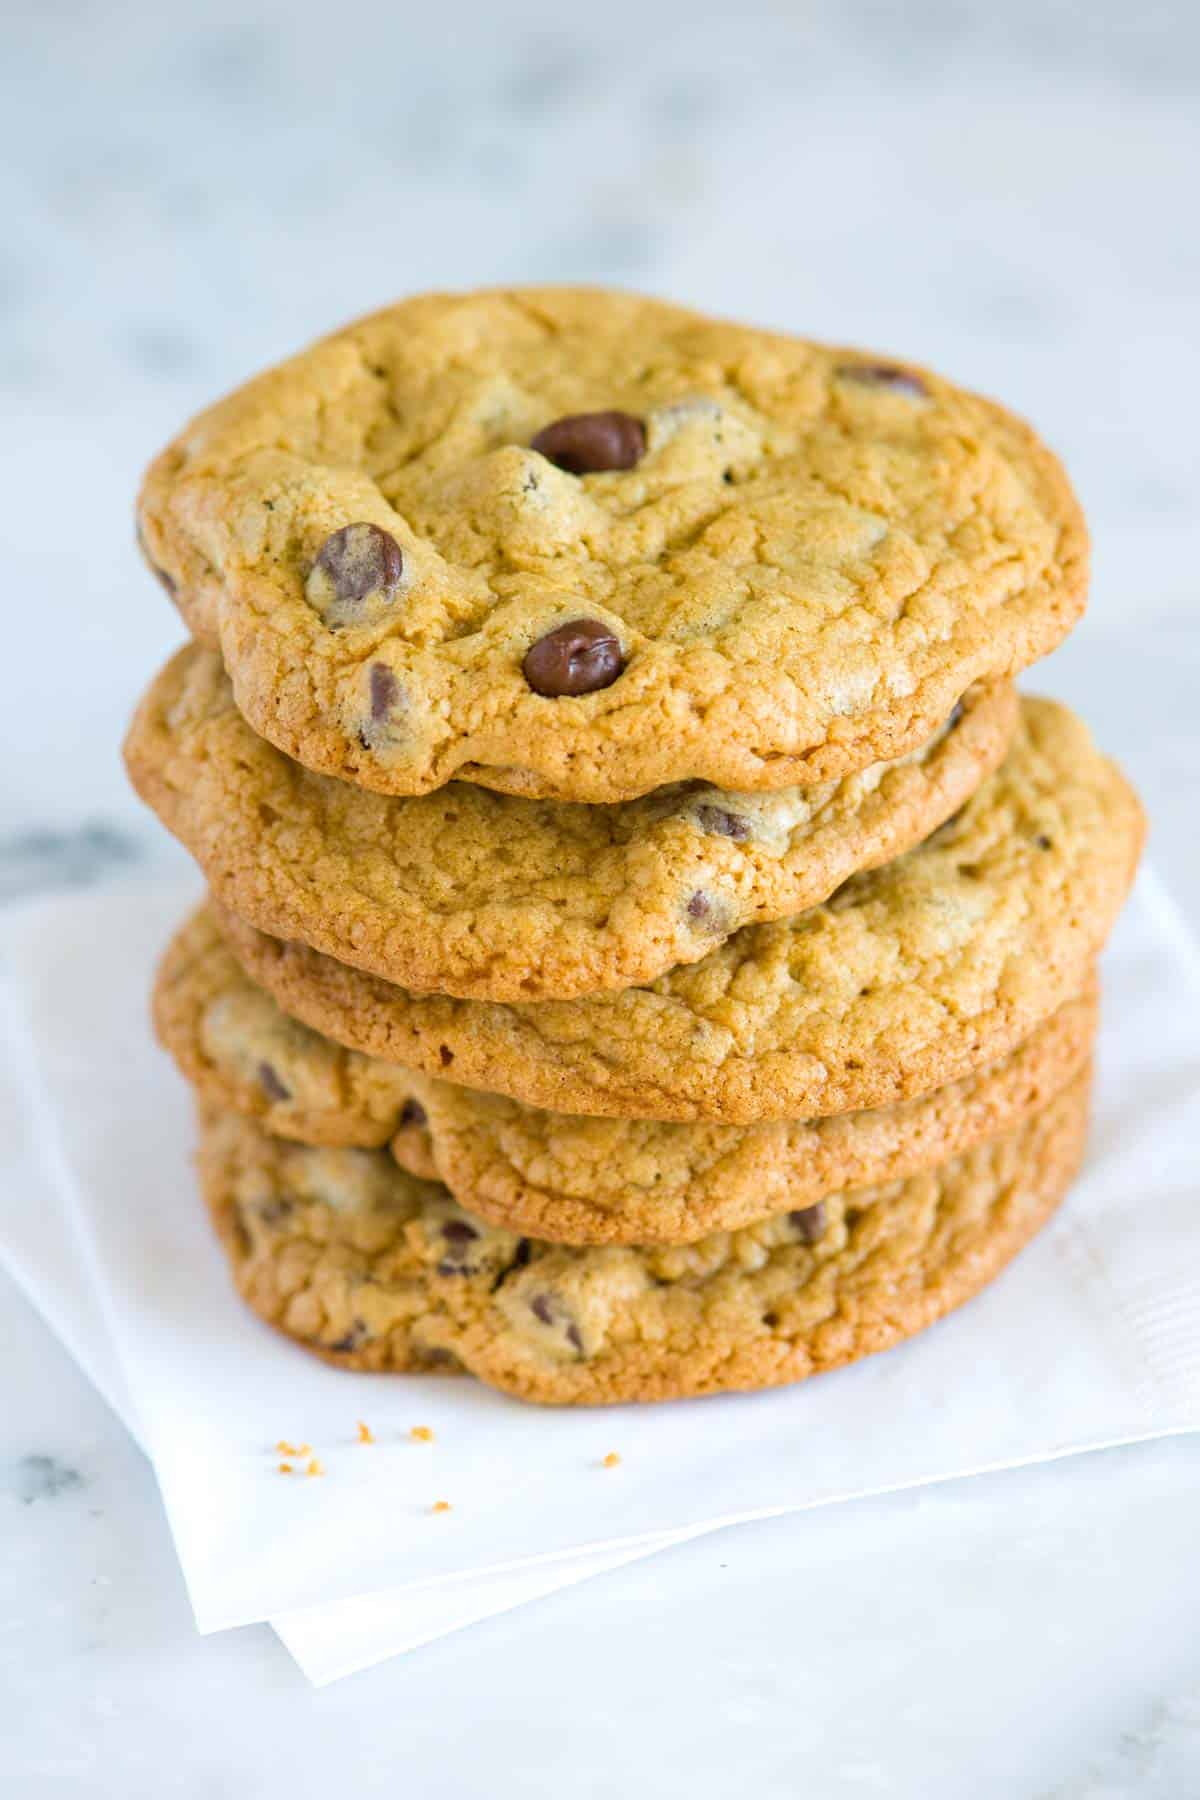
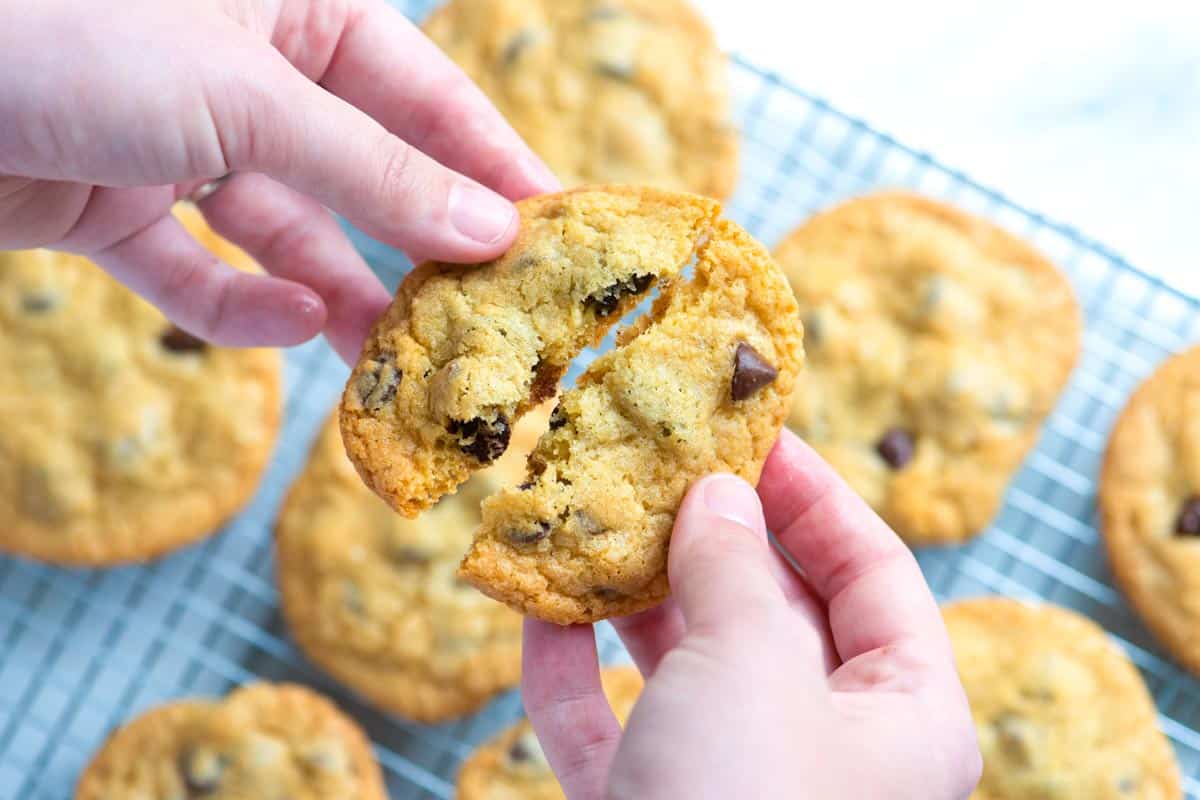
Our crunchy, chewy chocolate chip cookies are the perfect balance of thin, crispy cookies with just the right amount of chewing in the middle. These cookies are totally appealing with melting chocolate chips, brown sugar tips and vanilla.
If you like thin, crispy, slightly chewy chocolate chip cookies, then this cookie recipe is for you! There are so many chocolate chip cookie recipes out there (there are two on the blog), but this is the recipe I use when I want that super crispy edge. These spread well across the baking sheet (and therefore with a crisp edge), but the Midtles still have a bit of chewy texture as they use a granulated and brown sugar blend.
For thick cookies, either cool the dough (below the tip) or use a simple chocolate chip cookie. And for more cookie inspiration, I’m a huge fan of these chewy chocolate cookies!
Important ingredients
Wheat Flour: Made with versatile flour. I love chewing chocolate chip cookies using breadcrumbs. If you want to experiment, consider adding 1-2 tablespoons of milk as the dough may be dry. When measuring flour for cookies, use a spoon and sweep method to fill in the metric measurements provided in the measuring cup or recipe. Baking Soda: I prefer baking soda with chocolate chip cookies over baking powder. Because it helps to brown, rise and return slightly, and is more chewy than soft. Butter: The recipe uses salty butter, but if it’s what you have, you can use salted butter. For butter called in the recipe, you should omit 1/2 teaspoon salt (so reduce the salt required in the recipe to 1/4 teaspoon). Please note that this recipe requires room temperature butter. If you want to make cookies now, use a simple chocolate chip cookie recipe that requires melted butter. Eggs: Eggs add to the richness and flavor of our cookie dough. For best results, use room temperature eggs. If the eggs are straight from the fridge, leave them warmer for a few minutes before using in the recipe. Sugar: I love the granular and brown sugar combination in this cookie recipe. Granule sugar helps them to spread and become crisp around the edges, while brown sugar adds flavor and keeps it a little chewy in the center. Vanilla and salt: These are for the flavor. I’m generous with my vanilla! Chocolate: Use your favorite chocolate. I usually go for semi-sweet chocolate because the cookies aren’t too sweet. Dark chocolate and chocolate combinations are also fun!
How to make crunchy chocolate chip cookies
These homemade chocolate chip cookies are easy! You use a stand mixer, but you can create these cookies with a handheld mixer. If you don’t have either, try a simple chocolate chip cookie that requires melted butter. In other words, you just need to make a spoon.
You can’t get enough of these crispy, chewy cookies. You can now find a large bag of cookie dough in the freezer (this dough freezes like a dream – I shared my tips below).
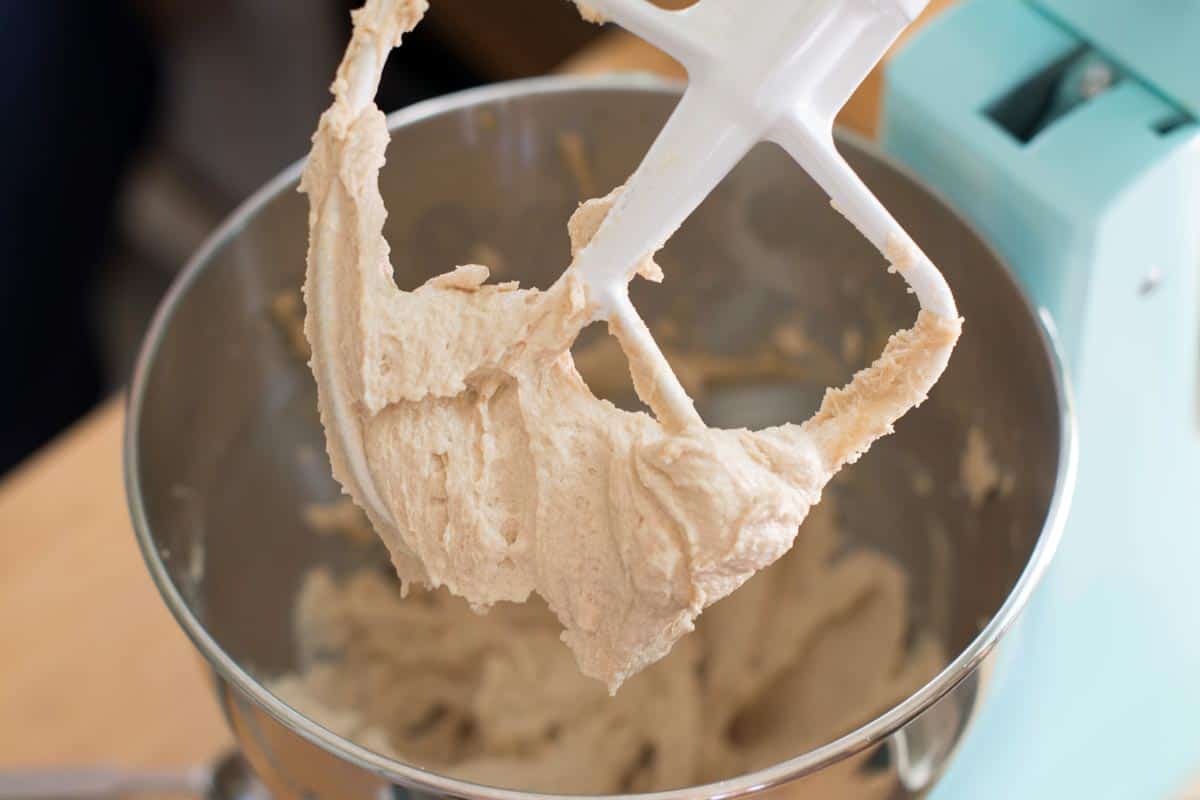
Start by creaming the butter, sugar and vanilla until it looks light and fluffy. Please refer to the photos for reference or watch the video. It usually takes about 3 minutes to reach this point using a stand mixer at medium speed. Now add the eggs. This requires only a simple mix.
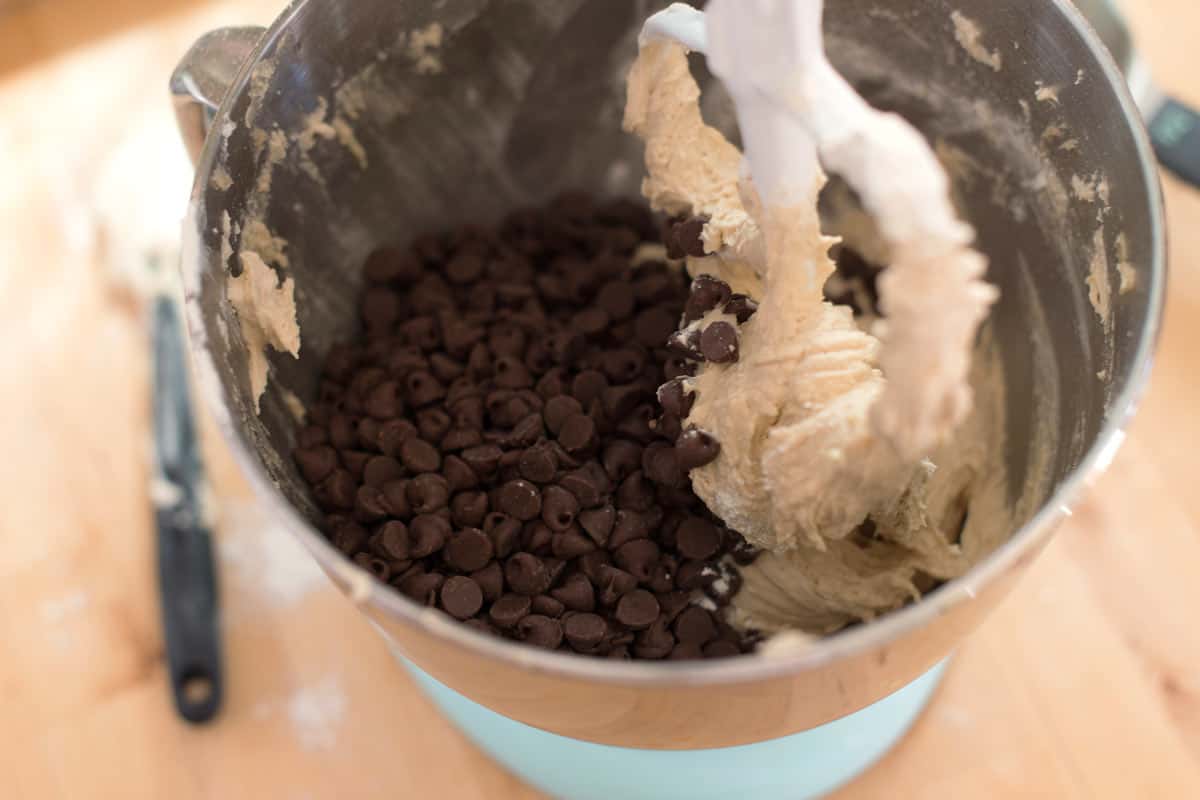
From there, you can slowly add the dry ingredients (wheat flour, baking soda, salt) and steam the chocolate and mix until the entire cookie dough is complete. At this point, if you notice that you are eating cookie dough (who is there?), consider making edible cookie dough. This makes it safer to leave the eggs and slightly heat the flour, making it safer to eat it raw.
At this point, there are a few options. First, you can bake cookies right away. Doing this makes them look like our video. You get a thin cookie with a crisp edge and a slightly chewy center. Secondly, you can cool the dough. This is a great trick for even more delicious cookies that don’t spread that much when baked. And finally, the dough can be frozen. This is a victory for days or weeks from when you need to fix cookies.
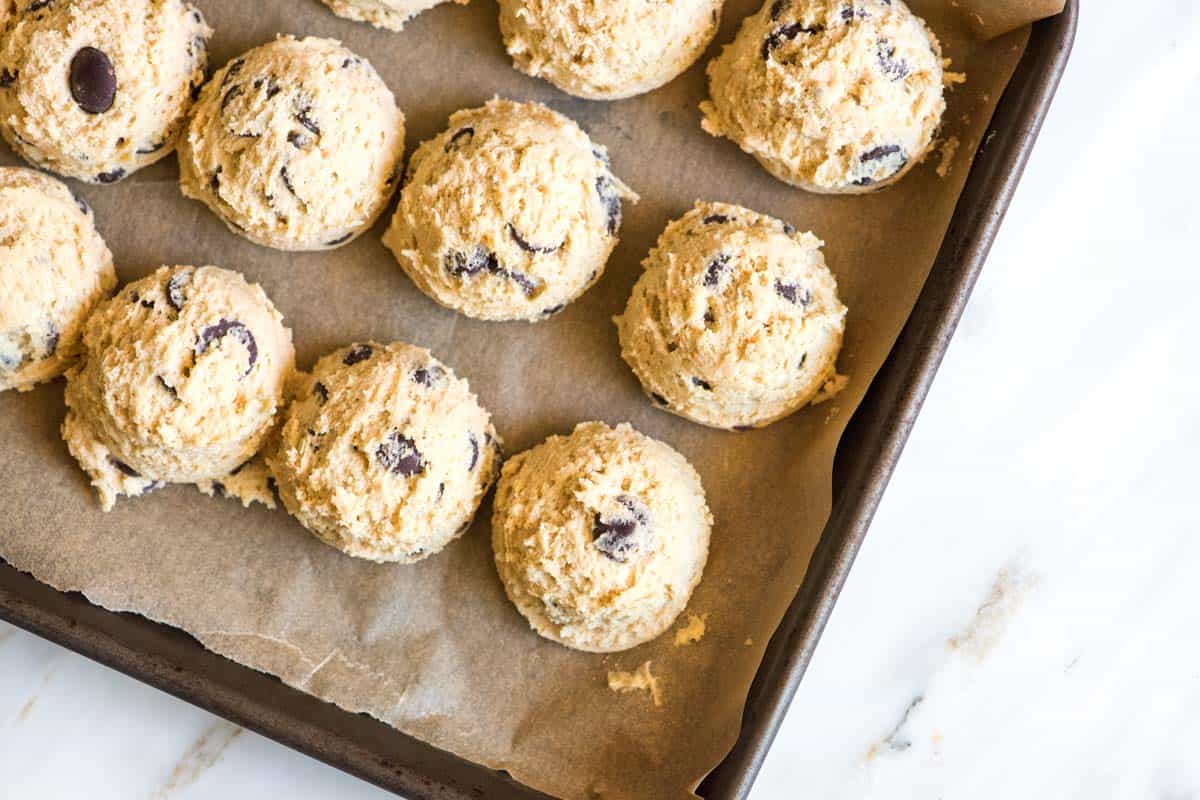
The photo below shows how to chill or freeze cookie dough. Chilled dough is difficult to scoop, so later before chilling or freezing to save power in your elbows. More storage and freezing tips are available in the recipe!
Crispy and chewy chocolate chip cookies
Preparation
20 minutes
Cook
20 minutes
total
40 minutes
If you like crunchy edges, slightly chewy centers and cookies on the thin side, make these chocolate chip cookies. I love them and they remind me of what I got at my local bakery! These cookies can be baked quickly without cooling the time and offer thin cookies that spread a little more on a baking sheet (as in the video). You can also chill the dough and bake it for several hours or overnight. Both are great. It depends on your schedule!
Make 24 cookies
Watch as we make recipes
You will need it
2½ cup (325g) of general purpose flour, spoonized and flattened
1 tsp Baking Soda
3/4 teaspoon fine sea salt
1 cup (230g) of salt-free butter at room temperature
1 cup (200g) granulated sugar
1 cup (200g) lightly stuffed brown sugar
1½ tsp vanilla extract
Two big eggs at room temperature
2 cups (340g or 12oz) chocolate chips
direction
1Place the rack in the bottom third of the oven. Heat the oven to 350°F (180°C). Line the two baking sheets on parchment or use a silicone baking mat.
2Whisk flour, baking soda and salt in a medium bowl and set aside.
3Add butter, sugar and vanilla to a bowl of a stand mixer with paddle attachments. (Or, in a mixing bowl, using a handheld mixer). Combine butter and sugar at medium speed (4 in the blender), lightly fluffy and cream for 3-5 minutes.
4Scrape the sides and bottom of the bowl and add the eggs. Mix at medium and low speed for 30 seconds. It’s fine if the eggs aren’t fully integrated.
5Lower the speed to the lowest setting, add dry ingredients at a third and mix until mixed for 1-2 minutes.
6Add the chocolate chips and simply mix on slow speed until incorporated. Now you can bake the dough for up to 3 days, chill, or freeze it for up to 3 months (the hints below).
7Drop three tablespoons of dough (or using a large cookie scoop) onto a baking sheet. Leave 2 inches between cookies to allow for spreading.
8Bake cookies one at a time, spinning them for 15-18 minutes while cooking. The cookies should be golden around the edges, but the middle should be brighter. Let the cookies cool on a baking sheet for 2 minutes and then transfer to a wire rack to cool completely.
9Store cookies at room temperature for up to 3 days or in the fridge for up to 3 days for a week.
Adam and Joan tips
Storage of baked cookies: Store in an airtight container for up to 3 days in the room temperature or in the fridge. Freezer for longer storage (up to 3 months). Chilling Cookie Dough: If you have time, chill the dough and chocolate chip cookies are even better. Overnight in the fridge, the flour helps to absorb moisture from the eggs, chewing cookies, thickening (but still crunchy around the edges), and even better taste. Since chilled cookie dough is difficult to scoop, I form it into a bowl of cookie dough and chill them in an airtight container separated by a sheet of parchment. Refrigerate cookie dough for up to 3 days. Frozen cookie dough: Refrigerate frozen cookie dough for up to 3 days. Arrange the parchment on a baking sheet and prepare the dough as usual. Scoop out the cookie mound onto a baking sheet. You can hordes of dough mounds together. Please do not touch it. Freeze until hard. Transfer the frozen dough mounds to an airtight container or plastic bag. Store in the freezer. Bake frozen cookies without thawing, adding 3-5 minutes of baking time. Make small cookies: Remove 1½ tablespoons of mounds or use a medium cookie scoop on a baking sheet. Bake for 9-13 minutes. This recipe is estimated from the facts of the Back in the Day Bakery Cookbook and the Nestle Original Chocolate Cookie Recipe Nutrition.
Nutrition per meal
Serving size
1 Cookie
/
calorie
243
/
protein
3g
/
carbohydrates
33g
/
Dietary fiber
1g
/
Total sugar
22g
/
Total fat
12g
/
Saturated fat
7g
/
cholesterol
36mg
author:
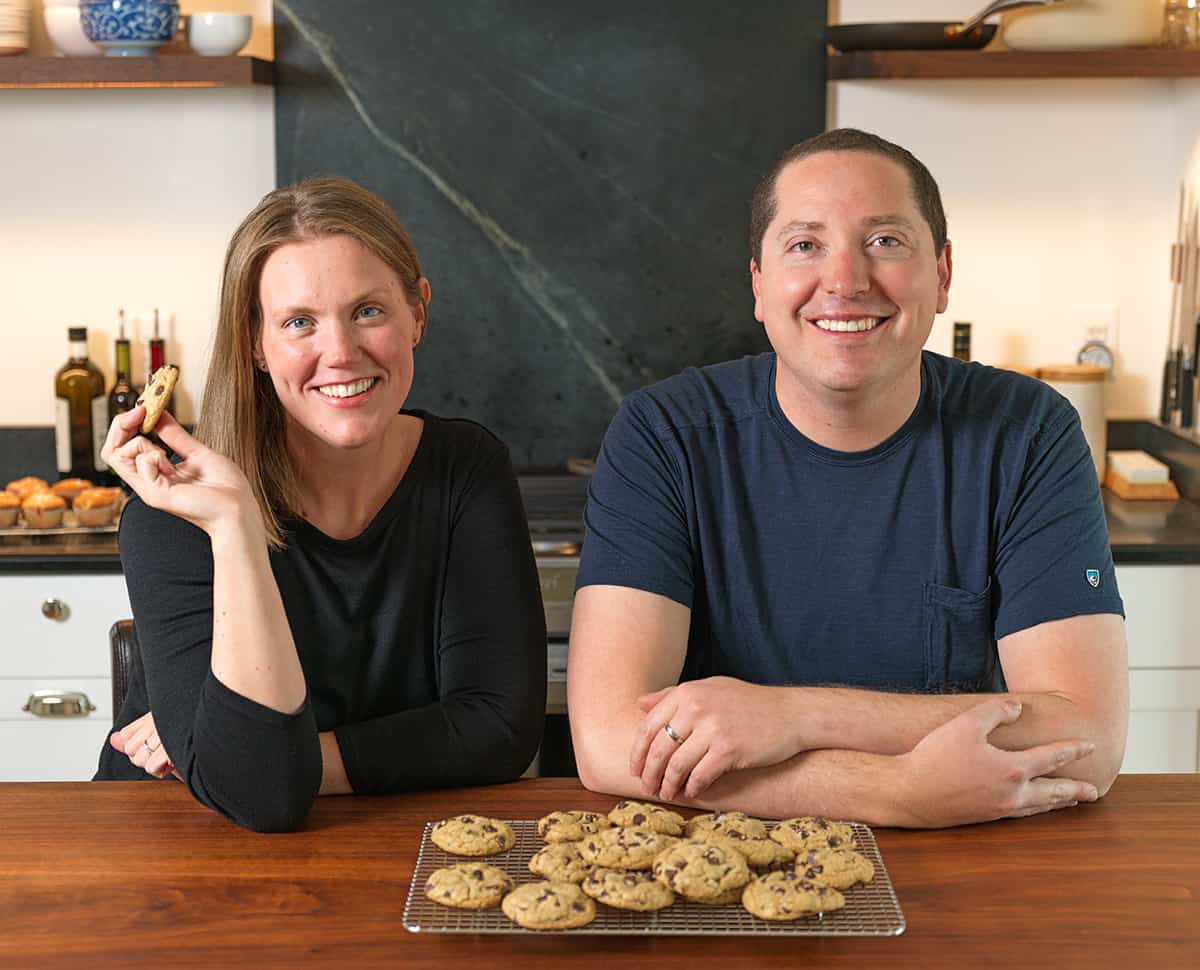
We are Adam and Joan, who have been passionate about cooking and sharing trustworthy recipes since 2009. Our goal? To inspire you to enter the kitchen and cook confidently a fresh, flavorful meal.