
For years now, these tender and juicy seared chicken thighs have been one of my go-to meals on my busiest nights. With just a few ingredients and even fewer steps, you can prepare a meal your whole family will love in about 15 minutes from start to finish.
Chicken thighs are one of my family’s go-to protein choices when we want a satisfying, hassle-free dinner. I’ve been making these oven-roasted boneless chicken thighs for as long as I can remember. For that very reason. That recipe is still a staple in our house, but sometimes you just need to get something on the table a little faster. This is where the thighs come into play.
Grilled chicken thigh

I have to confess something. I was never very good at cooking to begin with. My husband says I started at below level zero in the kitchen skills department (seriously, I once boiled the chicken before grilling it – oops).
Broilers can be a little scary, but we promise it’s not as difficult as you think. From preparation to cooking to serving, this recipe is easy to follow, even for first-time cooks, and takes just 15 minutes.
It’s more of a how-to than a recipe, but I make it at least once or twice a month. Once you’ve mastered the broiler method, you’ll be able to cook chicken in a whole new way by changing the spices to your liking.
Ingredients and Substitutes
Chicken – This recipe uses boneless, skinless chicken thighs.
Oil – This recipe uses light olive oil. If necessary, it may be helpful to use another neutral high smoke point oil.
Seasoning – We use generous amounts of garlic, smoked paprika, kosher salt, and freshly ground black pepper. If you can’t see the spices before you put the meat in the oven, it won’t taste as good when it comes out.
Notes on equipment
Sheet Pan – Whenever I bake or roast, I agree to use my favorite Nordic War baking sheet. It’s not heavy, but it’s sturdy, comes in a variety of sizes, and is reasonably priced. I’ve had mine for 20 years and it’s still going strong. tongs
How to make grilled chicken thighs
Preheat the oven: Start your oven’s broiler on high.
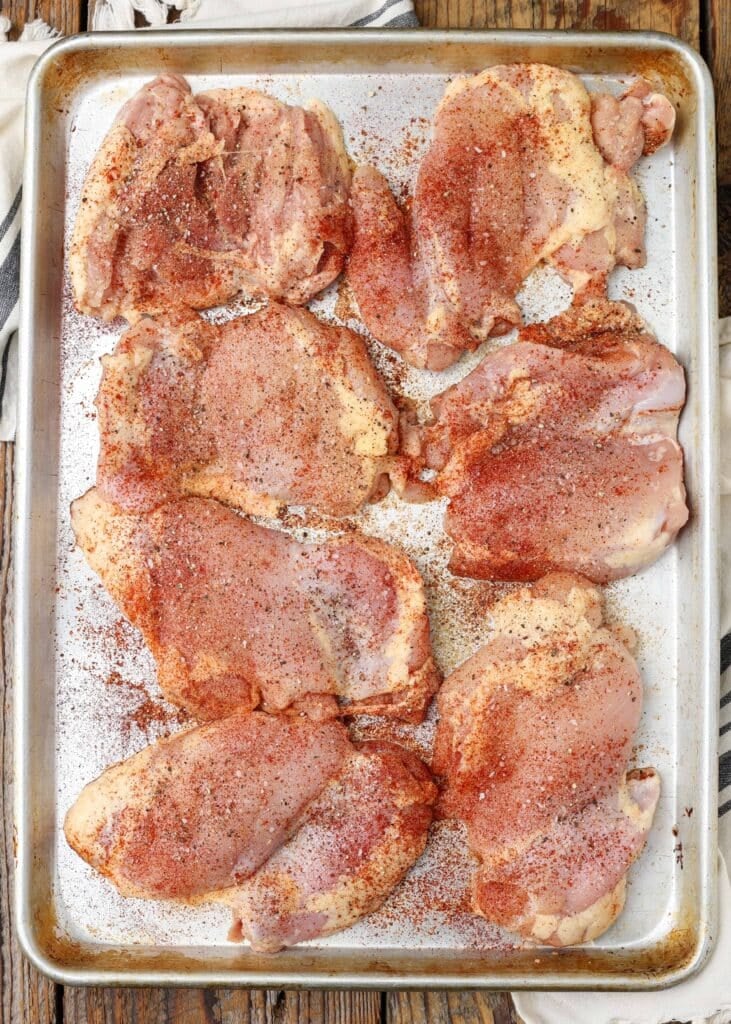
Arrange the chicken: While cooking, place the chicken thighs on a large baking sheet to allow airflow between them.
Drizzle with oil: Pour olive oil over the chicken.
Seasoning: Sprinkle the chicken thighs with garlic, paprika, salt, and pepper. Then flip the thighs over and season again.
Bake: Place the sheet pan with chicken in the oven and bake for 5-6 minutes.
Flip the chicken: Remove the skillet from the oven and use tongs to flip each piece of chicken over.
Bake again: Return the skillet with the chicken to the oven and roast for another 5 minutes, until the chicken is almost done.
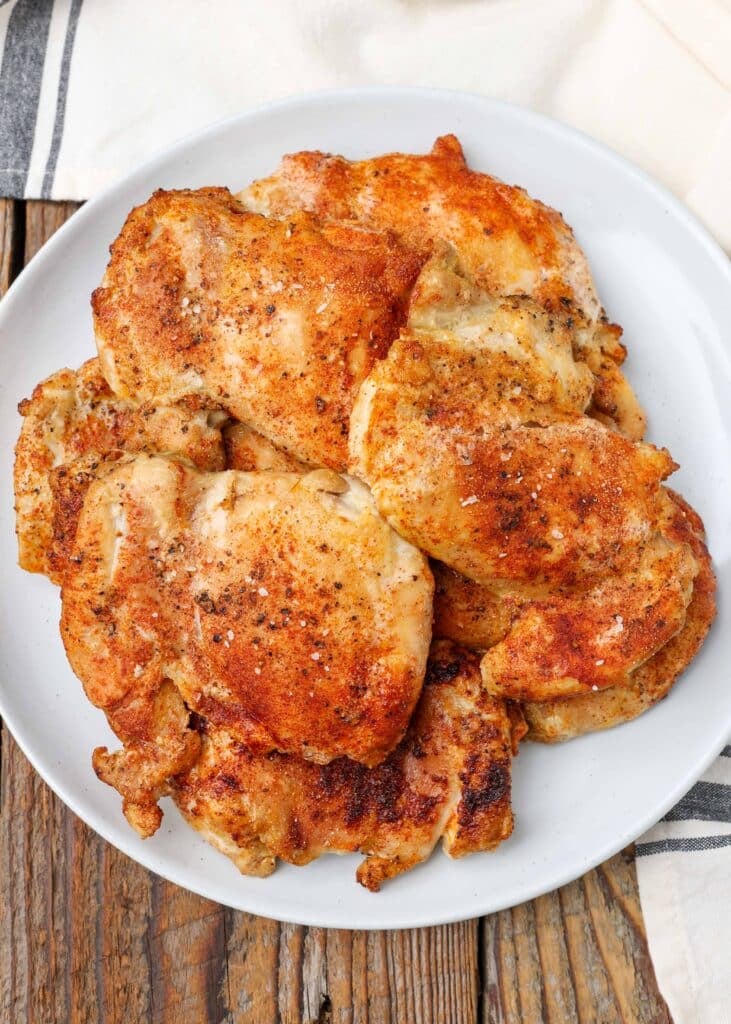
Flip again: Finally, flip the chicken thighs over and cook on the original side for another 2 minutes until crispy.
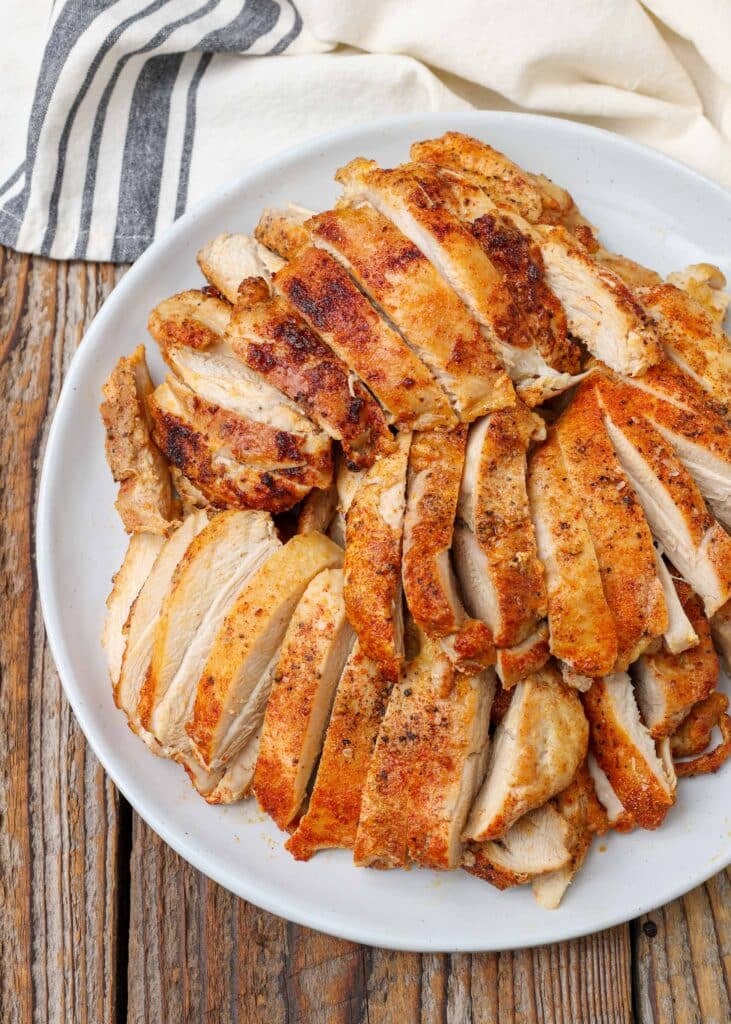
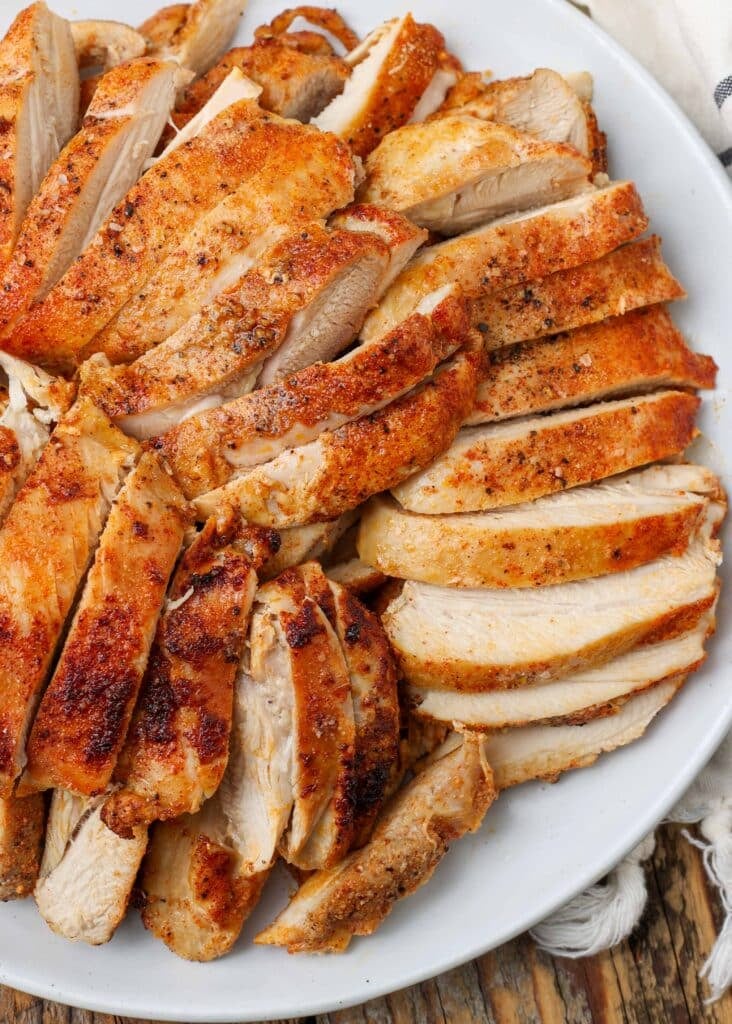
To serve: Let the chicken thighs rest for at least 5 minutes before serving.
expert tips
It’s often easy to rely on a timer to know when your chicken is done cooking. However, for best results, it’s best to keep an eye on the chicken and pay attention to its doneness. When cooked, chicken thighs should not turn white like breast meat, but they should not turn pink in the center. Juice should be clear. If using a meat thermometer, the internal temperature should be 165°F.
Add seasoning – I wear kitchen gloves and rub the spices into the chicken before cooking. This allows the seasoning to be evenly distributed throughout the meat.
Check for doneness – When making a final check on the chicken thighs before preparing to serve, it’s a good idea to use the thickest part of the chicken as a guide. I’ve forgotten to do this before, but the frustration of having to put the chicken back in the oven when everything else is ready is just not worth it.
Let the meat rest – We recommend letting the meat rest for at least 5-10 minutes before slicing it. This redistributes the natural juices evenly throughout the meat. If you slice it too soon, the juices will leak onto the cutting board, making the chicken dry and not very tasty.
offer suggestions
I serve this chicken with sweet and spicy coleslaw or street corn pasta salad for a quick weeknight dinner. These chicken thighs go well with a mango summer salad whenever I find mango on sale. All of these salads can be prepared early in the day, making them as easy as a summer meal.
Preemption and storage
Make-Ahead: This is the perfect make-ahead protein for lunches and other meals. I like adding this chicken to salads, wraps, and rice bowls.
How to store: I usually store these chicken thighs in an airtight container or ziplock bag. It will stay delicious for 3-4 days in the refrigerator.
How to reheat: I eat this chicken cold on a salad or reheat it in the microwave.
See more chicken thigh recipes
FAQ
Depending on your oven, we usually recommend 5 to 7 inches of spacing.
No, a broiler does not cook bone-in chicken the same way. Not recommended for this recipe.
No, frozen chicken must be thawed before grilling. If the center freezes over high heat, the center of the chicken will be undercooked and the outside will turn black.
Preheat the oven and bake. Place chicken on a large baking sheet. Drizzle with oil and sprinkle garlic, paprika, salt, and pepper on both sides of the chicken thighs.
Cook the chicken for 5-6 minutes on each side, then remove from the oven and flip. Bake for another 5 minutes until the chicken is almost done. If the piece is thick, it will take a little longer.
Flip again and cook for another 2 minutes, until the meat is no longer pink and the juices run clear.
calorie: 248 kcal | carbohydrates: 0.5 g | protein: 37 g | fat: 10 g | Saturated fat: 2 g | Polyunsaturated fats: 2 g | Monounsaturated fats: 4 g | Trans fat: 0.03 g | cholesterol: 180 mg | sodium: 556 mg | potassium: 471 mg | fiber: 0.1 g | sugar: 0.01 g | Vitamin A: 46 IU | Vitamin C: 0.01 mg | calcium: 18 mg | iron: 2 mg
Nutritional information is automatically calculated and should only be used as a rough guide.